-
Select an App Action Node
- In the node selection panel, you will find a tab called External Apps. Click on it to see the list of available external applications integrated with Plivo.
- Choose the app you want to interact with, such as Google Sheets, Salesforce, Zendesk, HubSpot, and others.
-
Choose an Action for the Selected App
- After selecting the app, a list of available actions will be presented. These are predefined tasks that the app can perform (e.g., creating a new sheet, appending rows, etc.).
- Create Sheet: Create a new Google Sheet.
- Append Rows: Add rows of data to an existing sheet.
- Batch Update: Update multiple rows at once.
- Configure the Action
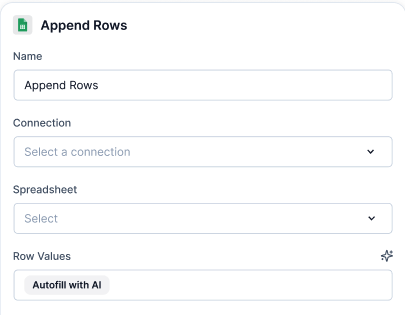
- Once you select an action, a configuration screen for that specific action will open. Here, you’ll provide details such as:
- Connection: Select or authenticate your connection to the external app (e.g., your Google Sheets account).
- Parameters: Fill in the necessary parameters for the action, such as the specific spreadsheet and row values (for actions like appending rows).
- If the app isn’t yet authenticated, you’ll be prompted to set it up through the Integrations page.
- Use Variables
- You can pass dynamic agent variables from earlier in the conversation into these actions. For instance, you might collect user input and append it to a Google Sheet as part of your workflow.
Troubleshooting
- App Not Integrated: If an external app isn’t integrated yet, you’ll be prompted to authenticate it during the configuration of the App Action Node. Make sure the correct permissions are granted.
- Incorrect Data: If the app action isn’t behaving as expected (e.g., incorrect data in Google Sheets), double-check that the correct variables are being passed, and verify the app’s connection and authentication.