- What: Register SIP phones (hardware or softphones like Bria, Blink) with Plivo to make and receive calls with custom business logic
- How: Create an endpoint in the Plivo Console with a username and password, then register your SIP phone using those credentials
- Key concept: Attach a Plivo Application to the endpoint. Its Answer URL receives call params and returns XML to control routing, conferencing, IVR, etc.
- Note: Plivo appends random numbers to the username you choose
- Instant conferencing — You can add calls made via a SIP phone registered with Plivo directly to a conference bridge.
- Access control — With a few lines of code, you can add the ability to restrict calls made from SIP phones or limit a phone to only accept calls.
- Monitoring and reporting — You can monitor all calls made or received on a SIP phone, and create custom dashboards and reports to analyze the data you get from the APIs.
- Smart routing — You can add intelligent extensions and shortcuts to route calls to and from traditional phone networks and WebRTC-enabled devices.
How it works
Once you configure and set up your SIP phone, register it with Plivo. When you initiate a call using the SIP phone, you don’t connect directly to another phone or extension. Instead, you instruct Plivo to fetch XML from the attached application on your server to handle the call request. This is similar to the way that Plivo handles incoming calls from a regular phone number. You can use all Plivo XML elements to handle a call request. You can also use the Dial element to dial out to a regular phone, WebRTC device, or another SIP phone.Getting started
- Sign up for a Plivo account.
- Create an endpoint by visiting Voice > Endpoints, clicking on Add New Endpoint, and filling in the required details. The Username should be a unique ID for the endpoint.
- Plivo adds random numbers after the username you enter. If, for instance, you choose “obiwan” as your username, Plivo might set it up as “obiwan01356015703850523884.” Specify a password you can use to authenticate the endpoint. Set an alias (maybe “ben” in this case) which Plivo uses when it displays all your endpoints, and optionally a subaccount to associate the endpoint with.
Using a default dialer application
To start making calls, attach Plivo’s default direct dial application to the endpoint you created.- If you already created the endpoint, go to the Endpoints page and click on the endpoint username. This will open an endpoint edit window. Select Direct Dial from the Application drop-down list.
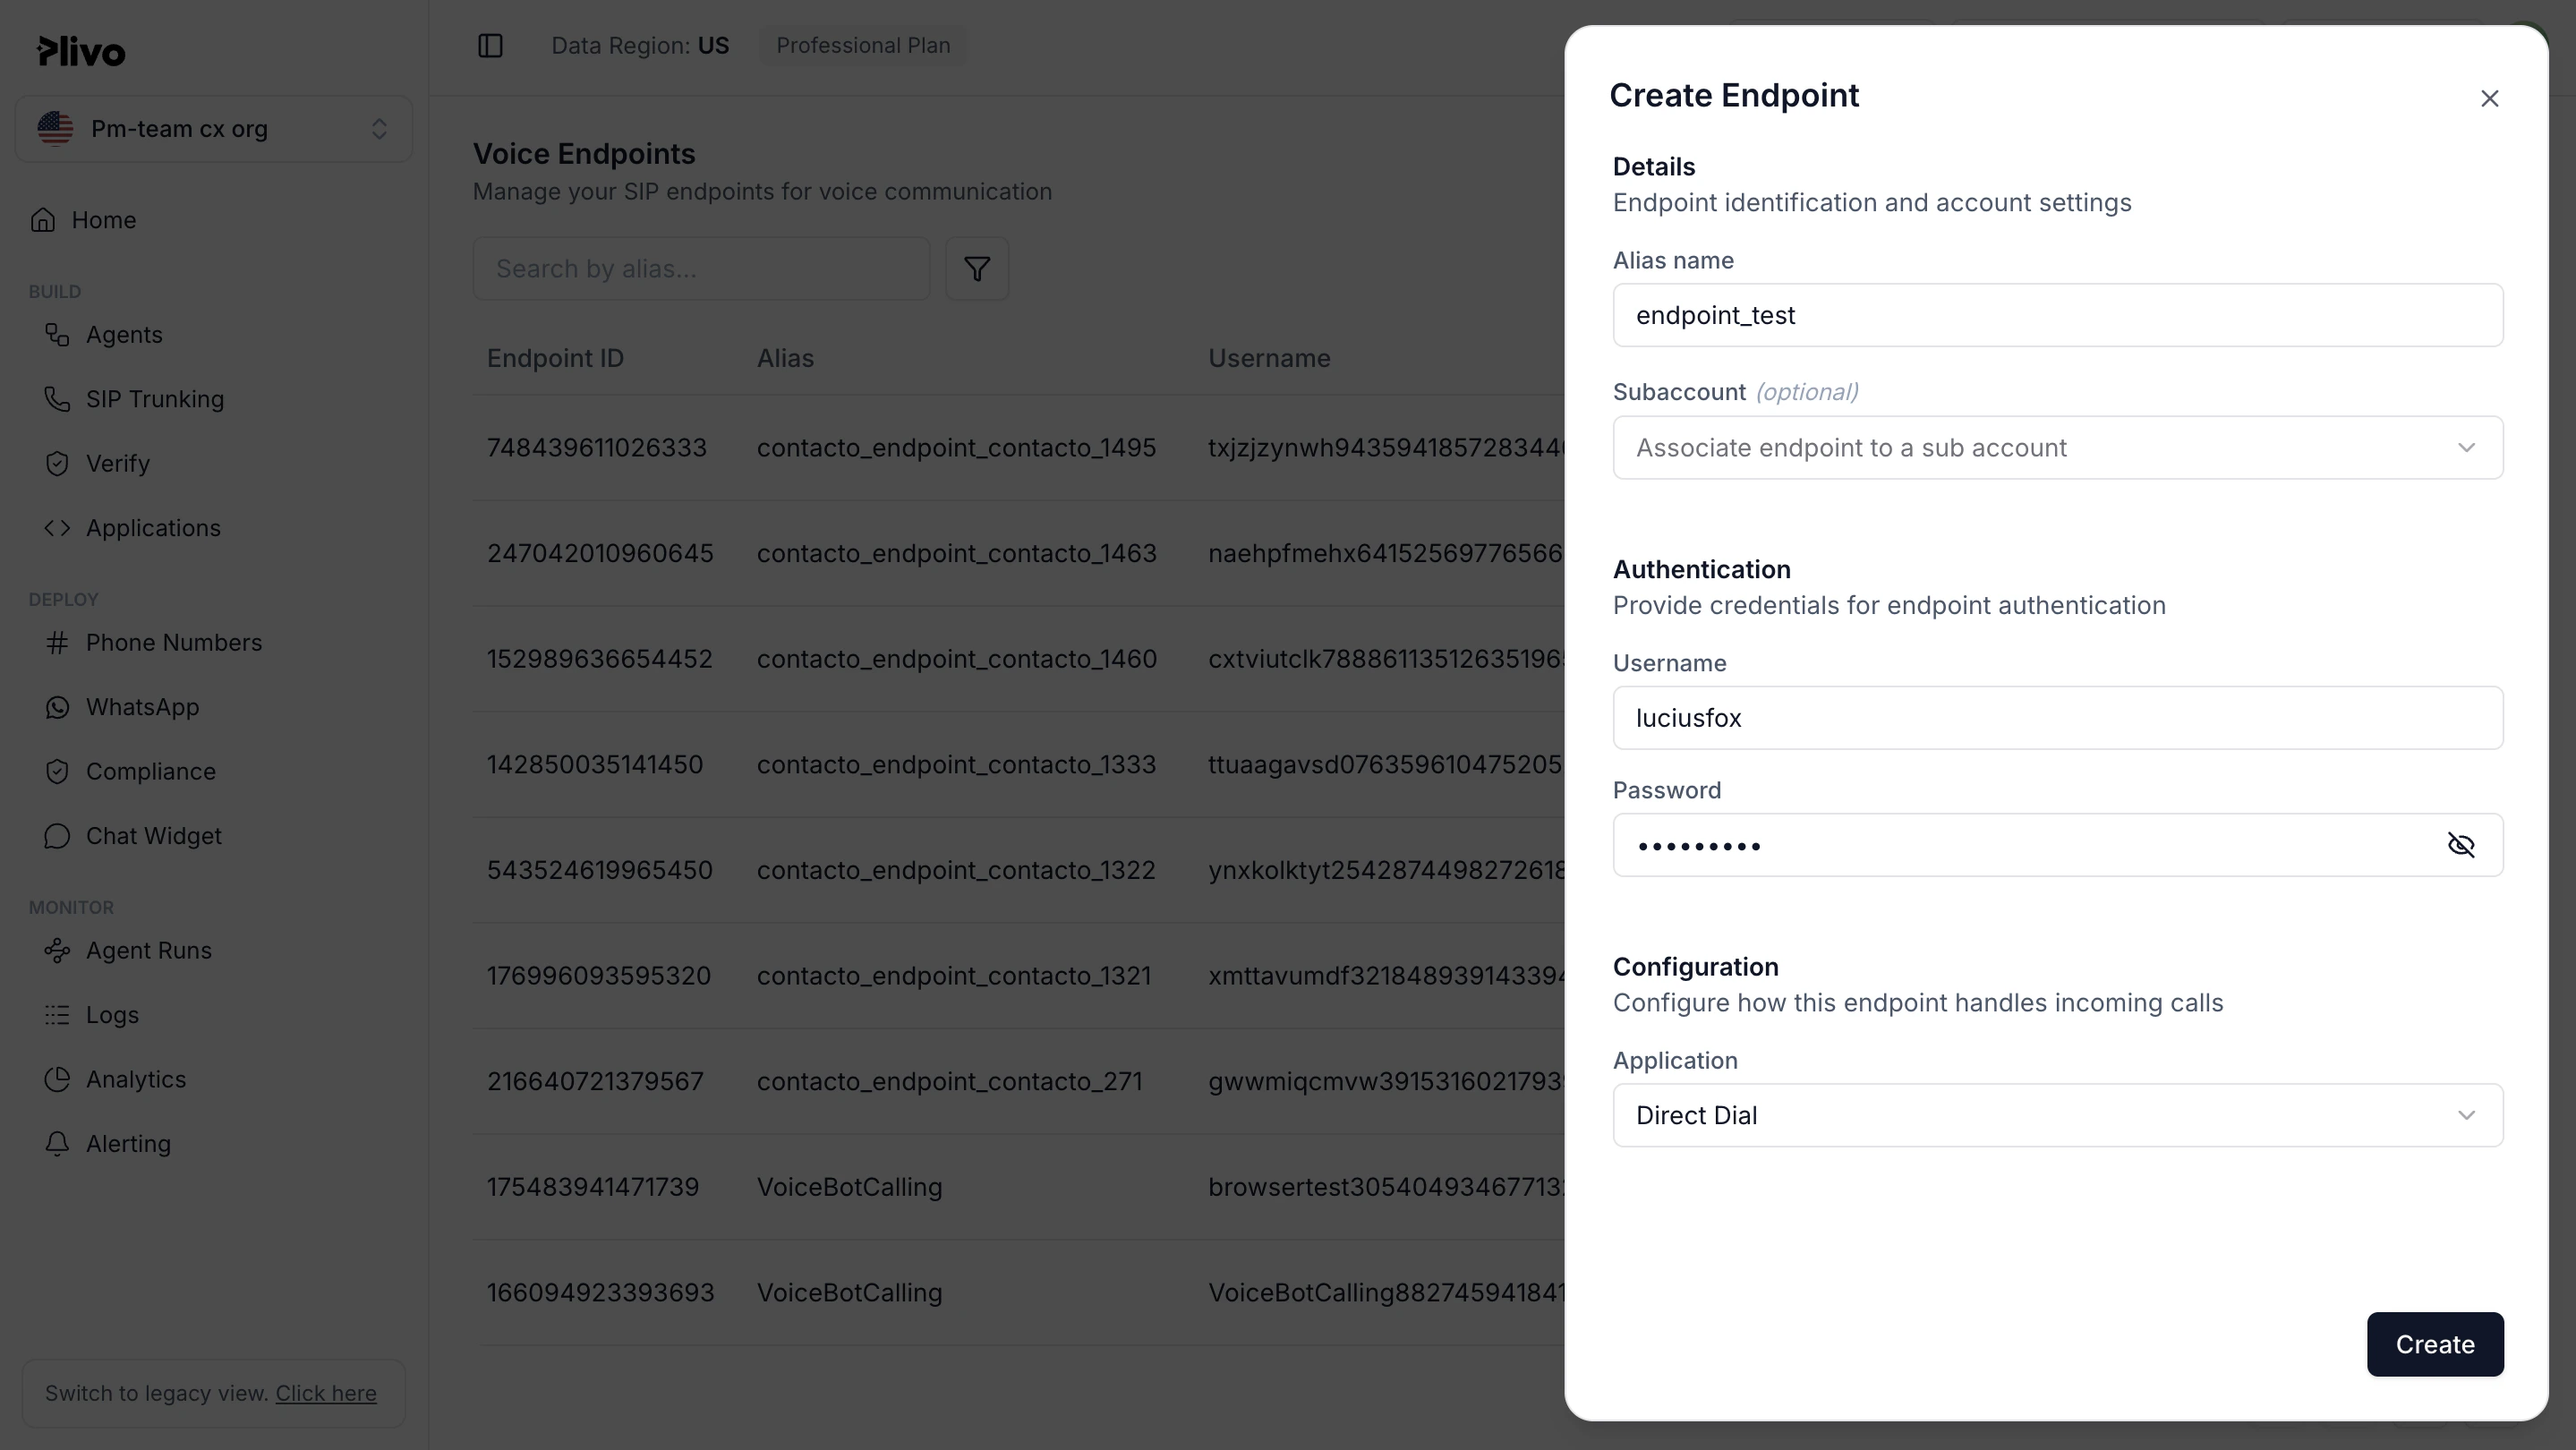
- If you’re creating a new endpoint, select Direct Dial from the Application drop-down list.
Customizing the endpoint application
When you make a call from a softphone, Plivo sends a request to the answer URL of the application attached to the endpoint with call-related parameters. To process the call, Plivo requires a valid XML response from the answer URL. Let’s say, in our case, that we want to create a quick dial application and make an outbound call to the number entered from the softphone. The answer URL will receive a request with the From and To parameters. Our application needs to parse these parameters and return a Dial XML element with the correct attributes.Configure your SIP phone
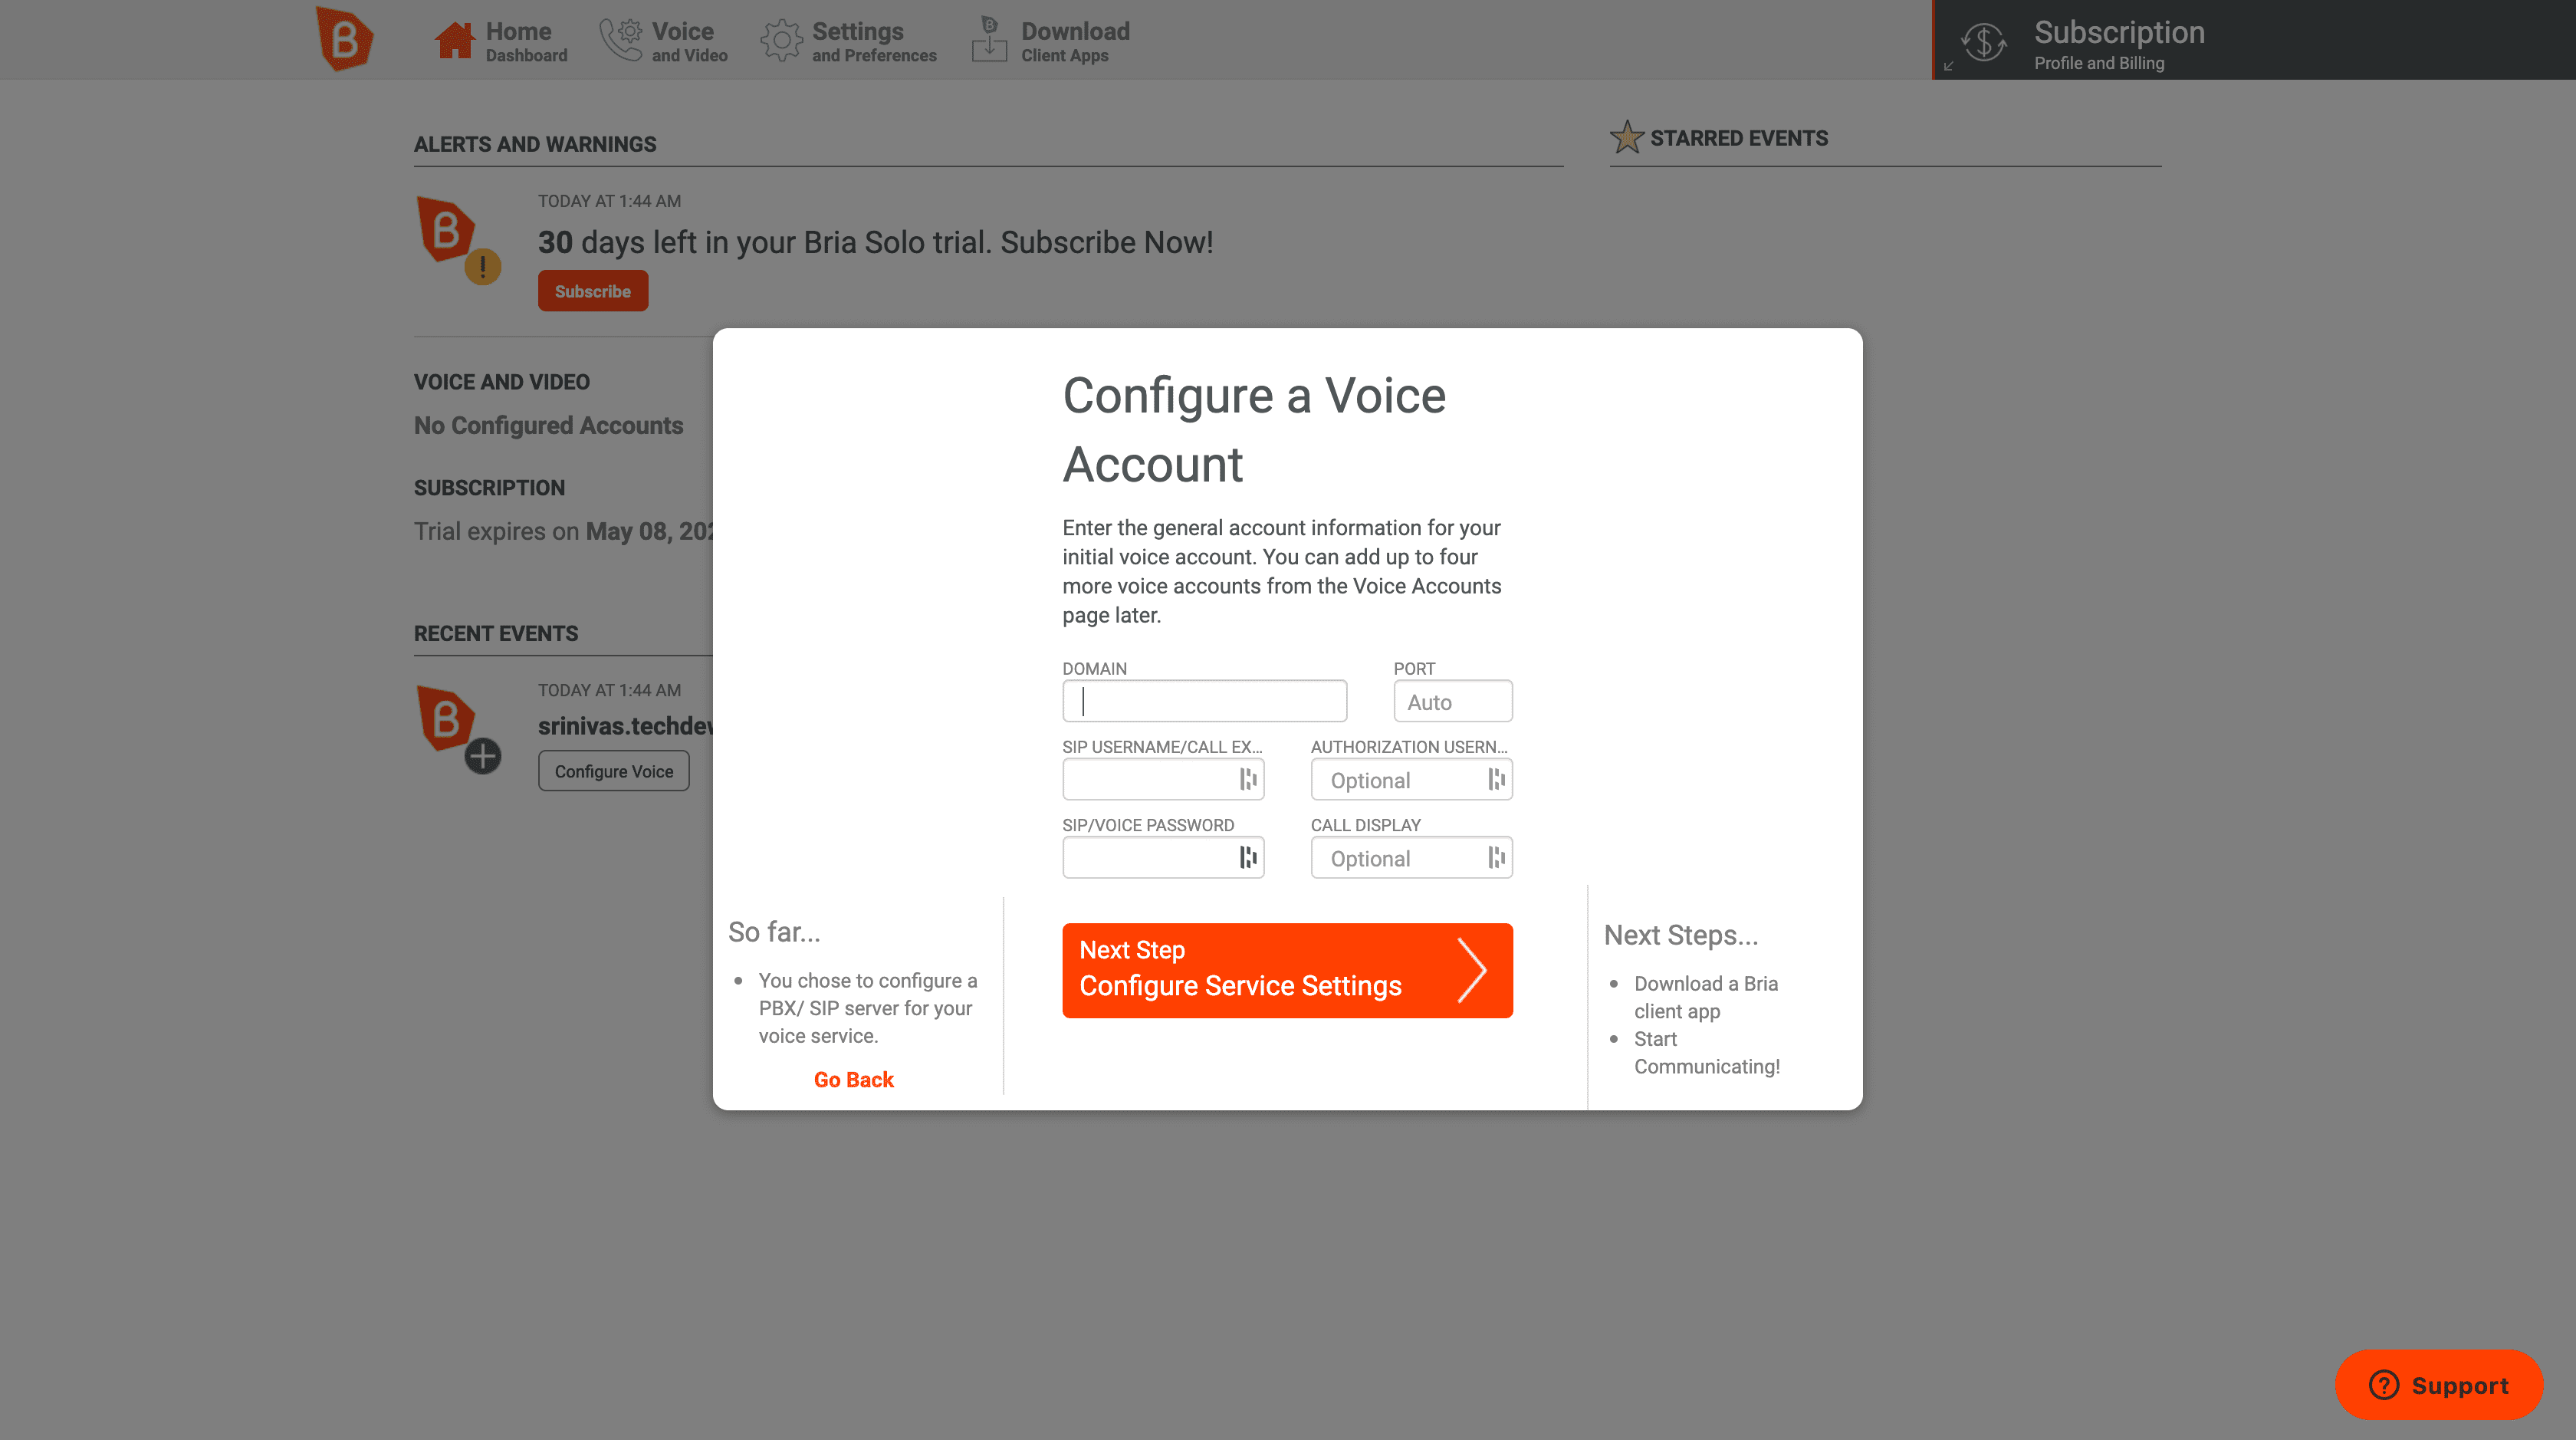
Once you have an endpoint set up you can associate a SIP phone with it. The way to do that varies depending on the phone. Here‘s how the process works with a Bria Solo softphone.- Create an account using the Bria portal.
- To configure a voice account, use the details of the Plivo SIP endpoint you created.
- Download and install the softphone software. If you’re on Mac or Windows, download Bria Solo (formerly X-Lite). On Linux, download Blink. For this tutorial, we use Bria Solo.
- Open the application and enable auto import voice account details to import the SIP account details and credentials.
Note: Field names may vary based on make and model of the SIP phone, but the configuration will still work.
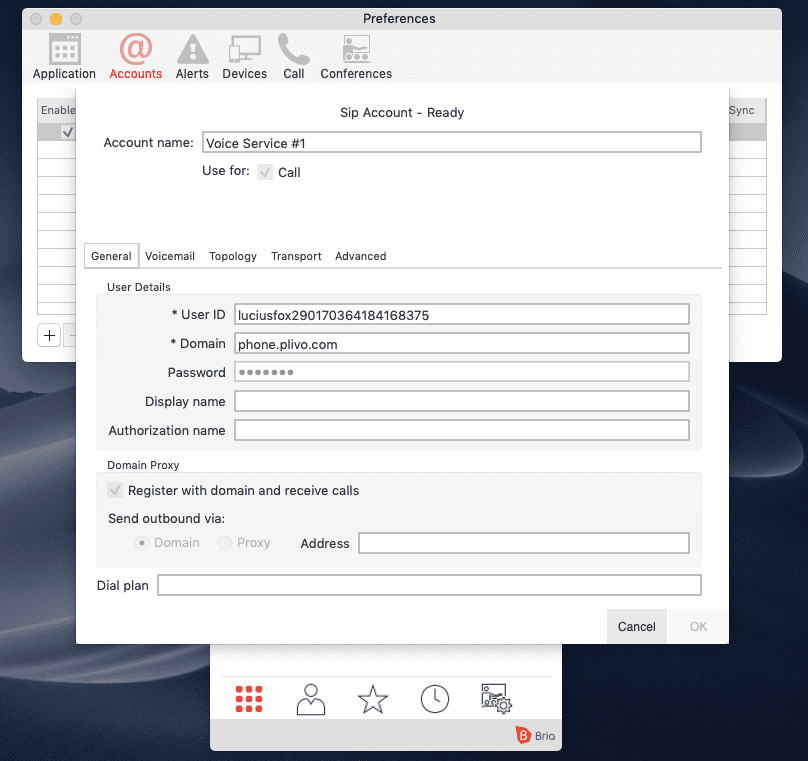
- Click on OK when you’re done.
- Your endpoint entry in the list should show as Enabled, indicating that your SIP phone successfully registered with Plivo.