Overview
This guide will help you test out your origination and termination setup by configuring a VoIP soft client. You can follow the step-by-step instructions available in this guide to configure X-lite (now Bria Solo). Testing your origination and termination setup using a VoIP client should help you to understand the use of Zentrunk. You can test the setup for outbound and inbound calls even before implementing Zentrunk.Prerequisites
To get started, you need:- Plivo account: Sign up to get a free trial account.
- Bria account and application: You can use your email address to sign up for Bria Solo and use the free trial plan for termination and origination setup. Once you’ve logged in, download the app from the Bria Solo dashboard for your preferred platform.
- Plivo Number (for inbound calls): You need to buy a Plivo number to receive incoming calls and to forward them to your trunk.
Outbound — Configure ZT for termination
Follow these steps to create an outbound trunk using Zentrunk and configure it on the Bria Solo application to make outbound calls.Create an outbound trunk

- On the Outbound Trunks page of the console, click Create New Outbound Trunk.
- In the New Trunk window, enter a name for your trunk (for example, Bria_termination).
Note: By default, the trunk is enabled.
- Under Trunk Authentication, select the IP Access Control List, the Credentials List, or both.
Note: Make sure you choose either an IP Access Control List or a Credentials List. The IP Access Control List is a list of the IP addresses from which a SIP invite may be accepted for this trunk. The Credentials List provides a username and password used to authenticate the SIP invite.
- To create a Credentials List:
- Click + Add New Credentials List.
- In the Create Credentials List window, enter the name for your auth group (for example, Bria_termination), username, and password.
- Click Create Credentials List to save and add your Credentials List.
- Select the Credentials List, then click Create Trunk to create your outbound trunk.
- Copy and store the Termination SIP Domain; you’ll need it when you configure Bria Solo for termination.
Configure the trunk on Bria
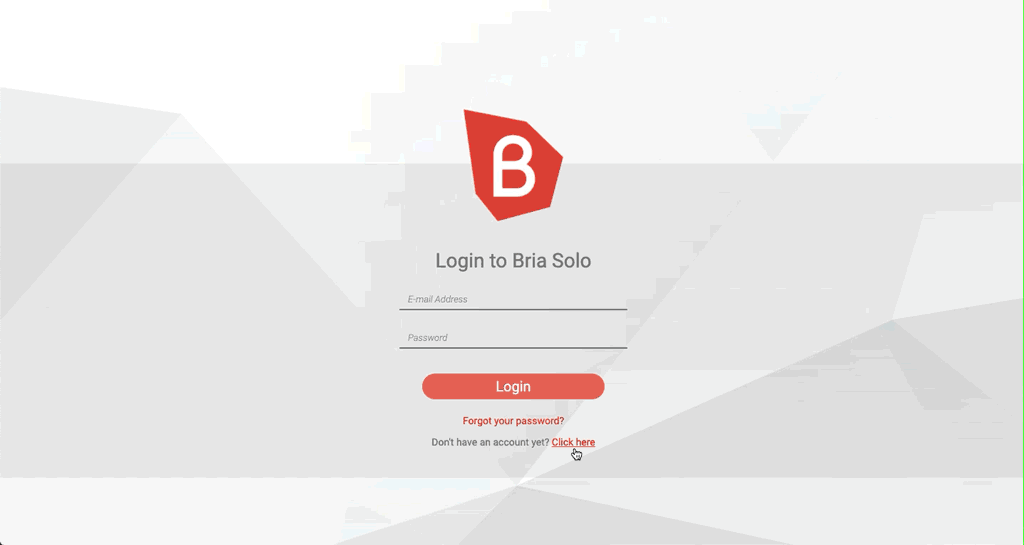
- Sign up for a Bria Solo free-trial account and log in.
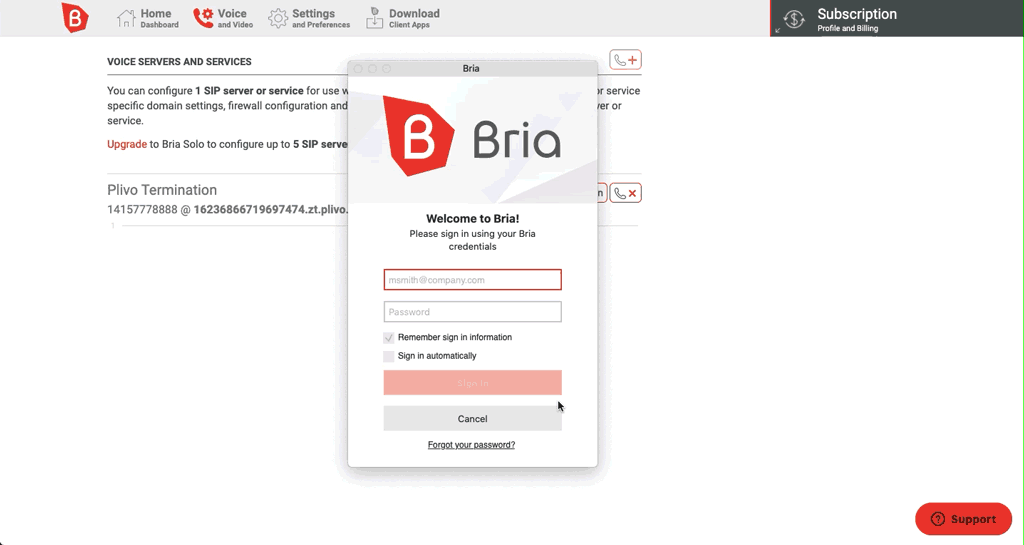
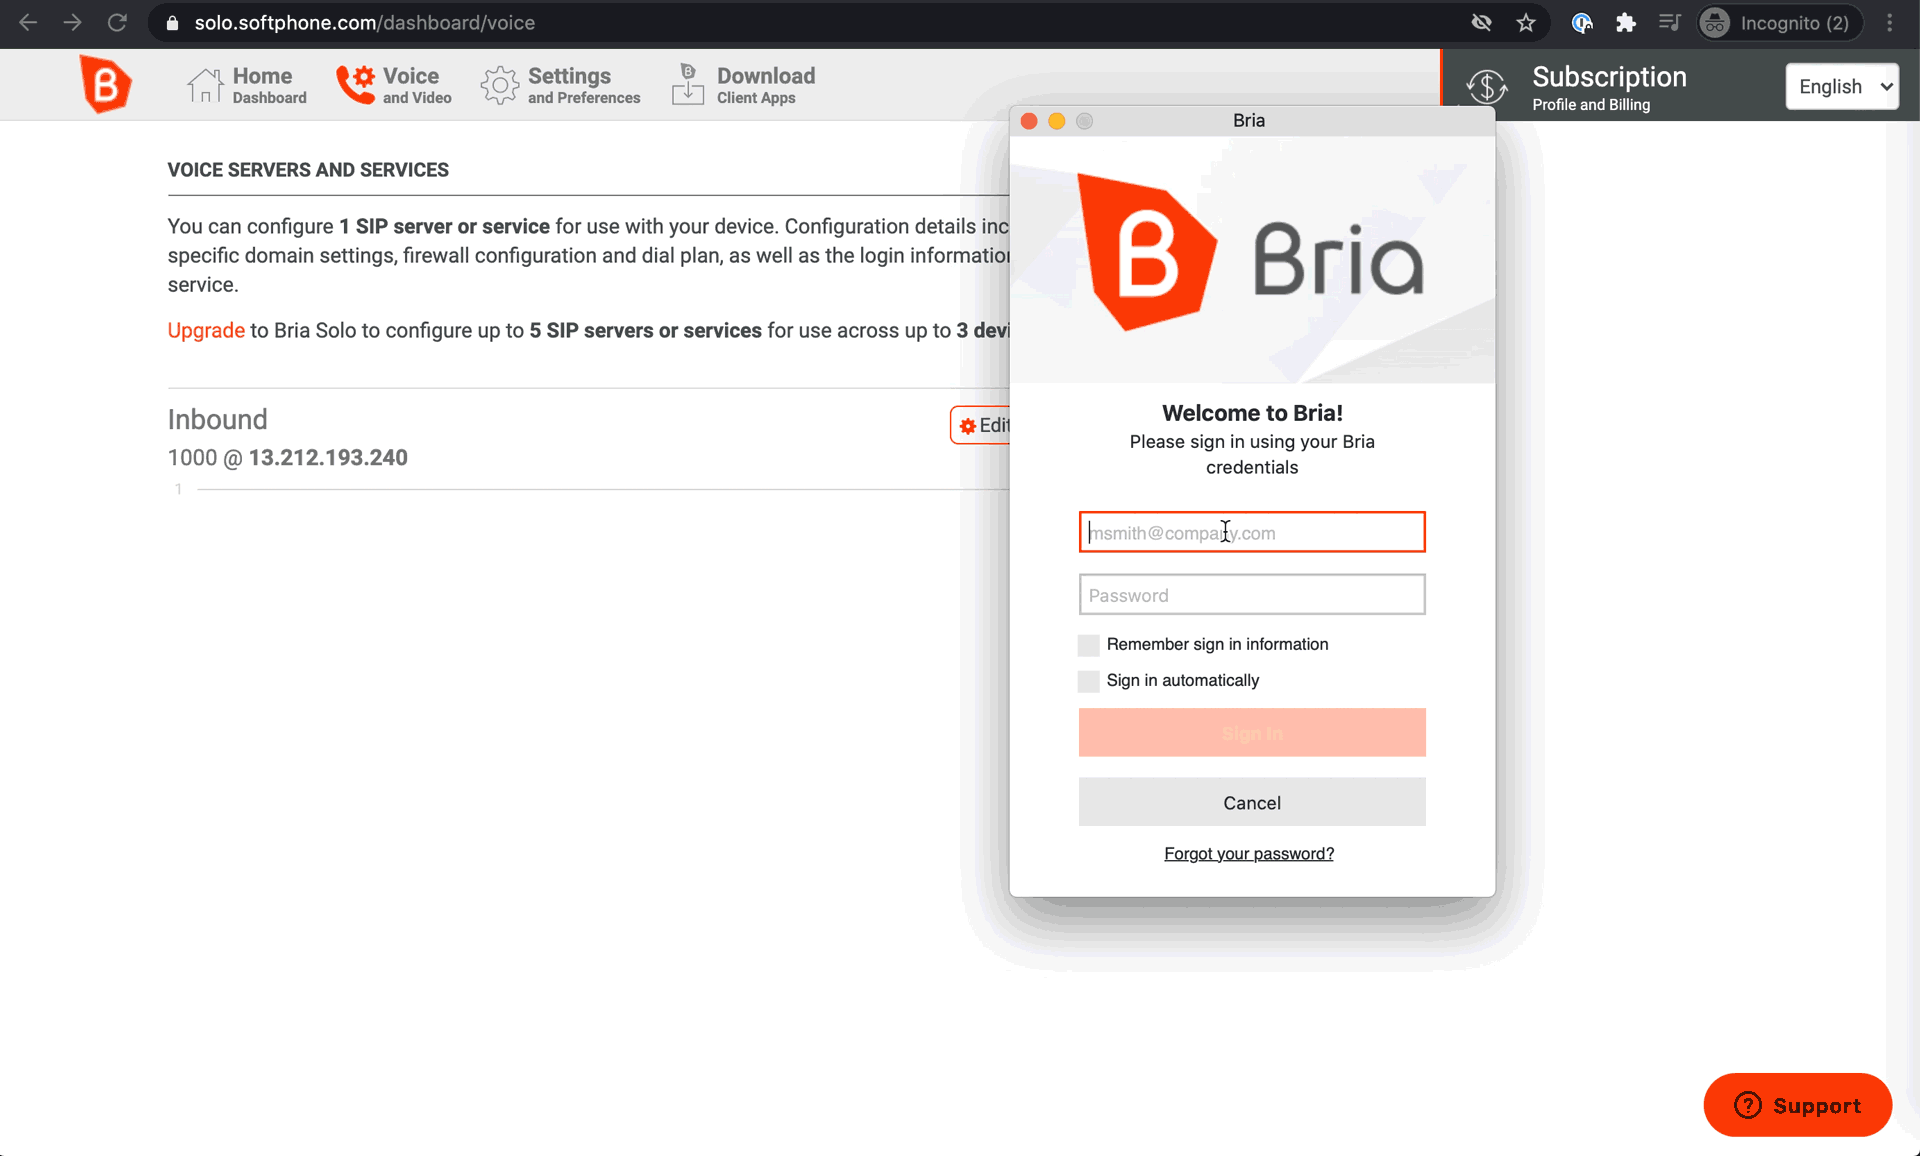
- Under the Voice and Video section, click on **Configure Voice and Video. You will be redirected to the Voice Servers and Services page.
- Click on Add Voice Configuration and select the Configure SIP Settings option.
- Fill the details in the New Voice Configuration window with the details of the outbound trunk created on the Plivo console:
- Provide a Service Label — for example, “Plivo Termination.”
- Copy and paste the Termination SIP Domain in the Domain field. This is the information that you stored when you created an outbound trunk.
- Provide a caller ID for your outbound calls in the SIP Username/Call Extension field.
- Configure the Authorization Username and SIP/Voice Password fields with the username and password of the Credentials List you created on the console for the outbound trunk.
- Go to the sService Settings tab in the New Voice Configuration window and uncheck the “Register with domain and receive calls” option.
- Click on Save and Close to save the configuration.
Terminate calls from Bria
Inbound — Configure ZT for origination
Inbound configuration on PBX
Once you’re done with the inbound configuration of any supported PBXes, take note of these details to create an inbound trunk using Zentrunk on the Plivo console.- IP address or FQDN to which an inbound call is to be routed.
- Credentials related to the ACL with which the inbound trunk is configured on your PBX.
Sample details
Use these sample values from the Freeswitch configuration for the test setup:- IP address: 13.212.193.240
- Username: 1000
- Password: 1234
Create an inbound trunk

- On the Inbound Trunks page of the Plivo console, click Create New Inbound Trunk.
- In the New Trunk window, enter a name for your trunk (for example, Plivo Inbound).
Note: The Enabled checkbox is selected by default.
- Select the Primary URI and Fallback URI of your PBX.
Note: The Primary URI is the FQDN or IP address to which all calls are forwarded first. If the Primary URI is unresponsive, the calls will be forwarded to the Fallback URI.
- To add a new Primary or Fallback URI, click Add New URI.
- On the Create URI window, enter a name for your URI (for example, inbounduri), and then enter the URI (the FQDN or IP Address of your VoIP infrastructure).
- Click Create URI to save and add your URI.
- Once you have created and selected your Primary and Fallback URI, click Create Trunk. Your inbound trunk will be created.
Configure the trunk with a Plivo number

- Once you click on Create Trunk in the next window, you can link your trunk with phone numbers.
- You can either link the trunk with your existing phone numbers in your account or buy a new phone number and link the trunk.
- If you want to use your existing numbers, select the phone numbers under the Current Phone Numbers section, and click Link Selected Numbers.
- If you want to use a new number, navigate to the Buy New Number section and choose the country, prefix, type, capability, and click on Search.
- Select a phone number and click Buy Number. The number will be added to your account and linked with your inbound trunk.
Configure the user with Bria
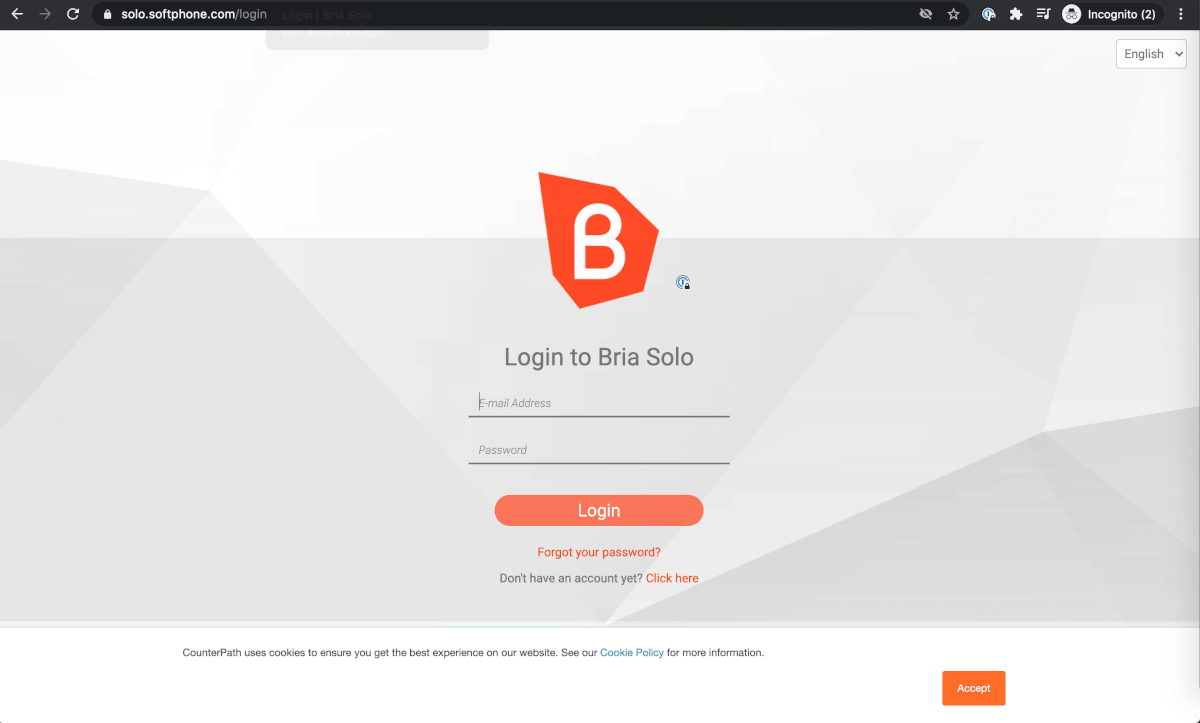
- Sign up for a Bria Solo free trial account and log in.
- Under the Voice and Video section, click on Configure Voice and Video. You will be redirected to the Voice Servers and Services page.
- Click on Add Voice Configuration and select Configure SIP Settings.
- Fill the details on the New Voice Configuration window with the details of the inbound trunk configured on your PBX:
- Provide a Service Label — for example, “Plivo Origination.“
- Copy and paste the Origination SIP URI in the Domain field. This is the information that you stored when you create the inbound trunk.
- Configure the Authorization Username and SIP/Voice Password fields with the username and password of the ACL you updated while configuring the trunk on your PBX. In this guide, we’ll use “1000” as the username and “1234” as the password.
- Go to the Service Settings tab in the New Voice Configuration window and provide the IP address of the PBX in the SIP Proxy field. Check the “Register with domain and receive calls” option if it’s unchecked.
- Click Save and Close.
Receive incoming calls on Bria
- Open the Bria Solo application.
- Log in to the Bria account using the same email address and password you used to create the Bria Solo account.
- Once the login is successful, you can receive calls on the Plivo phone number to which the inbound trunk is assigned. The calls will be routed to the user configured on the Bria Solo application using the inbound trunk created on your Plivo account.