- Configuring outbound calls to ensure calls initiated from Vapi are routed through Plivo to the destination number.
- Configuring inbound calls to ensure calls received on a Plivo number are forwarded to Vapi via SIP.
Configuring outbound calls
Follow these steps to route outbound calls from Vapi through Plivo.Step 1: Create an outbound SIP trunk in Plivo
- Log in to the Plivo console: Plivo Login.
- Navigate to Zentrunk (SIP) → Outbound Trunk → IP Access Control List: Access Control List.
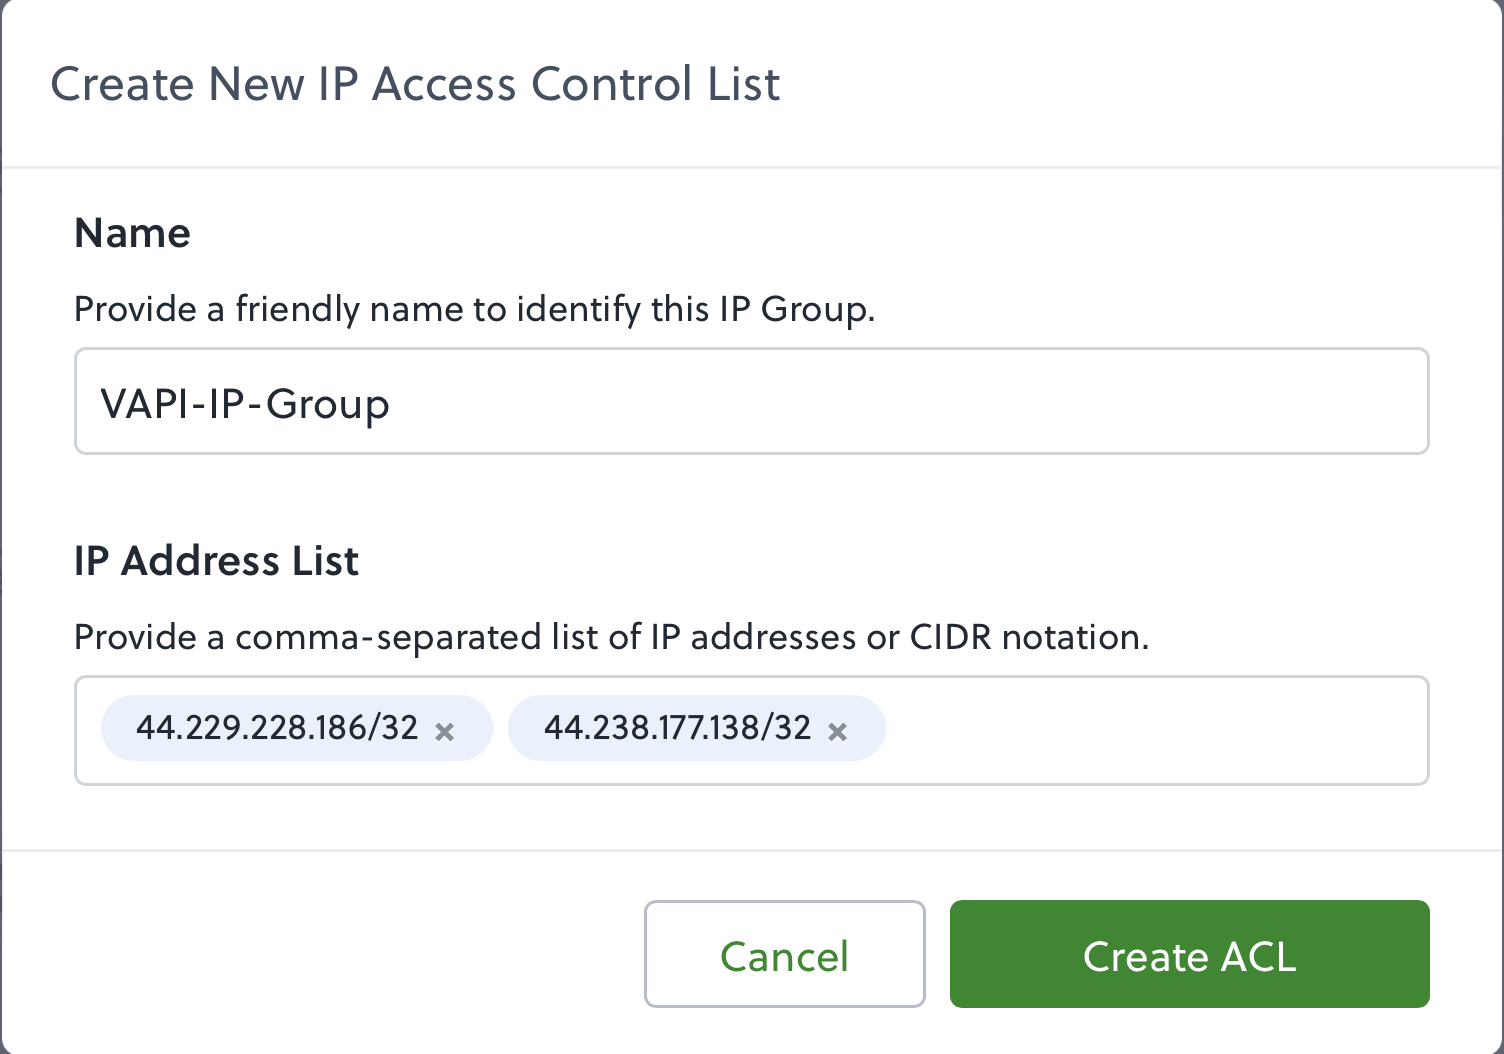
- Create a new IP Access Control List.
- Assign a name of your choice.
- Whitelist the following Vapi IP addresses:
44.229.228.186/3244.238.177.138/32
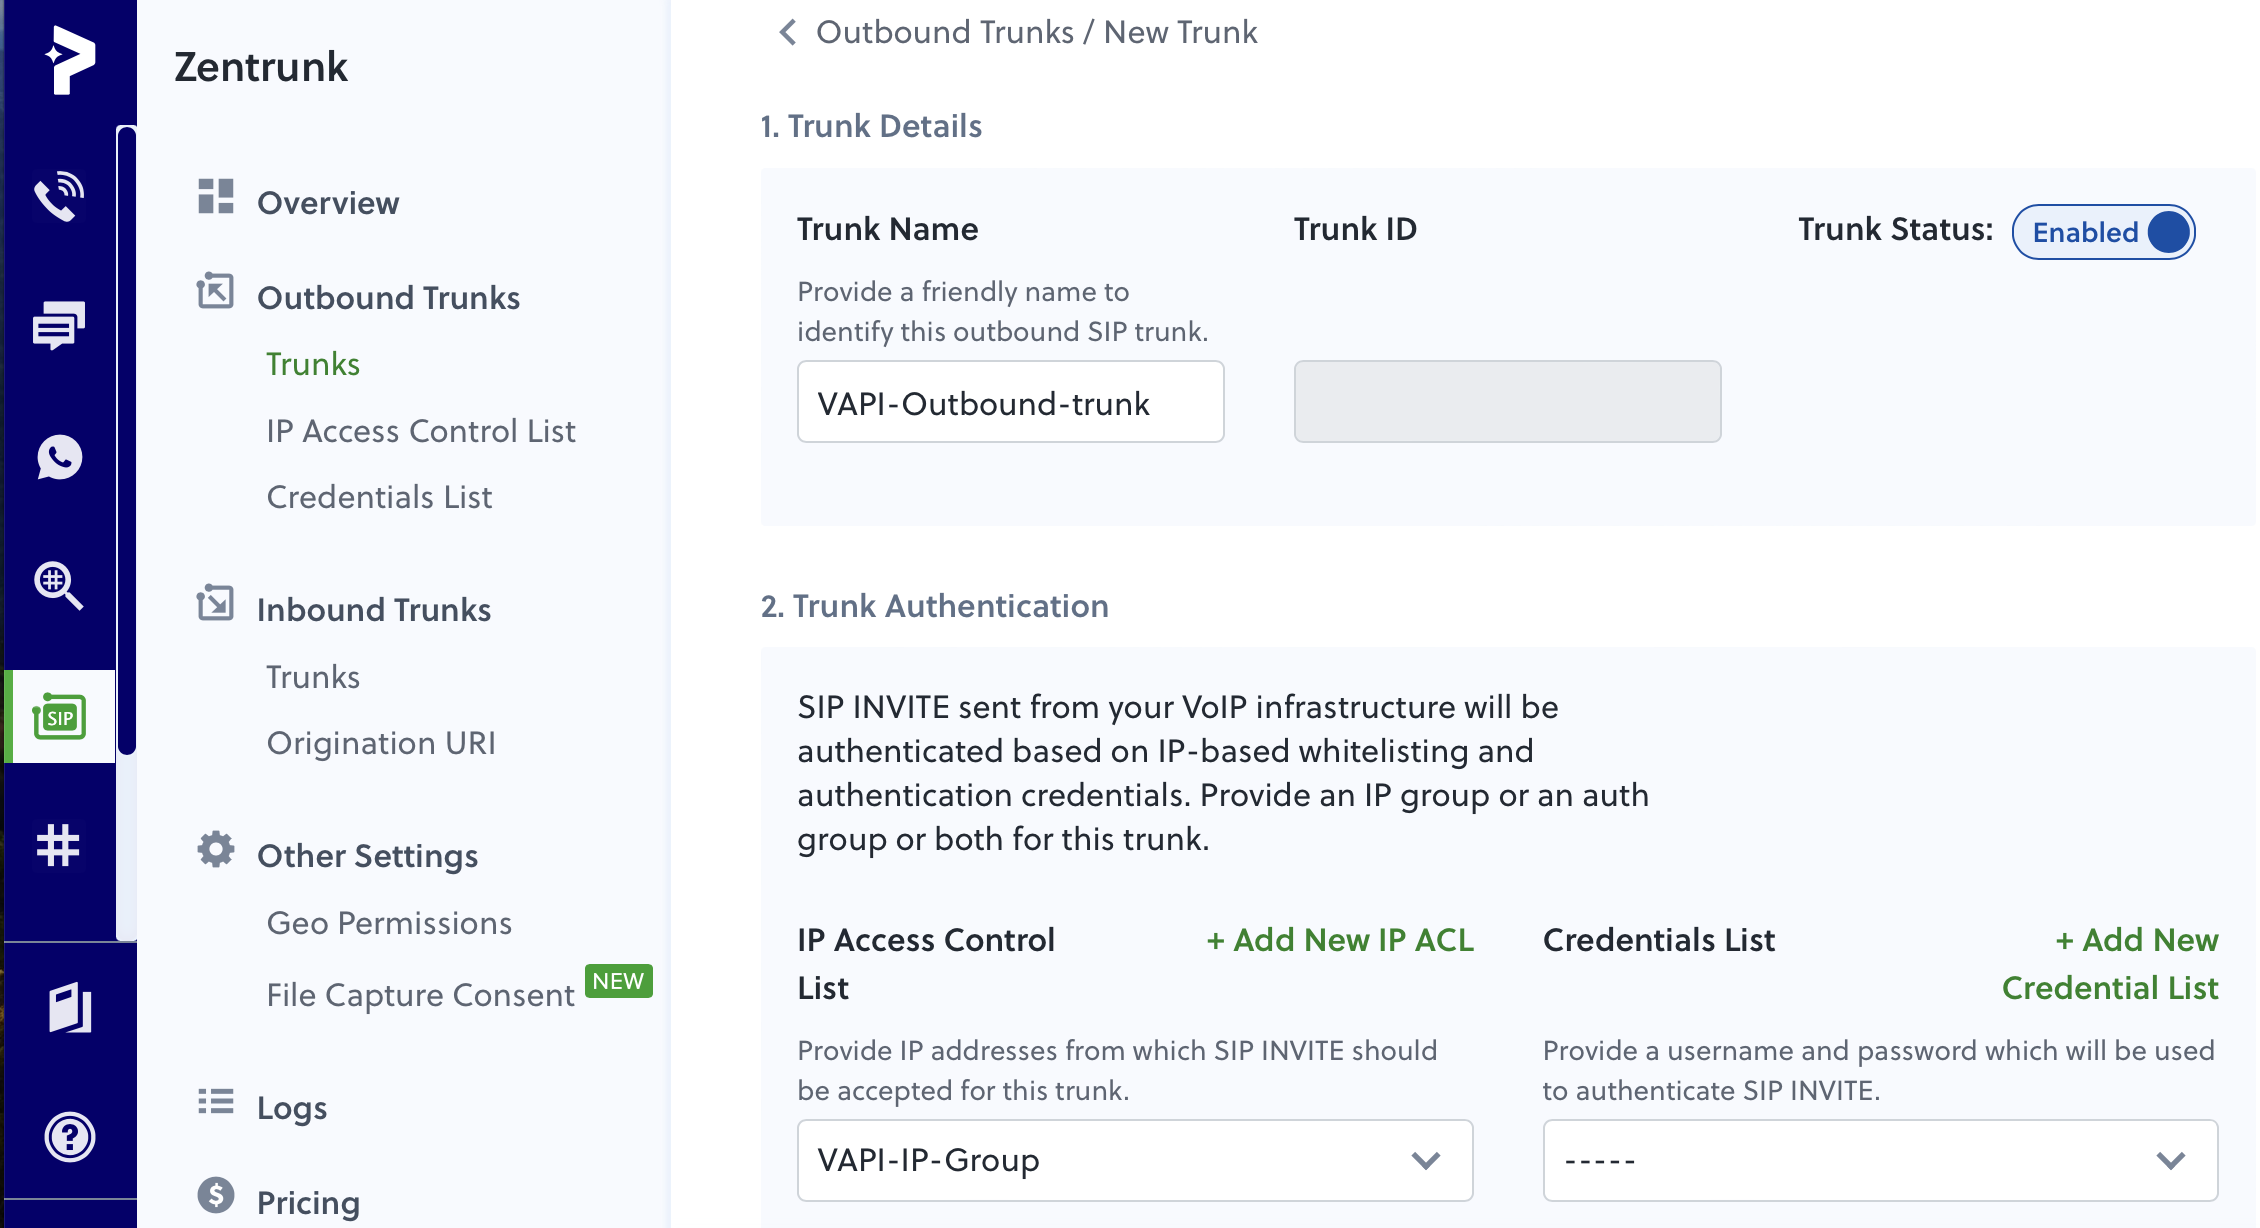
- Navigate to Create Outbound Trunks: Create Outbound Trunk.
- Provide a name and select the IP Access Control List created in the previous step.
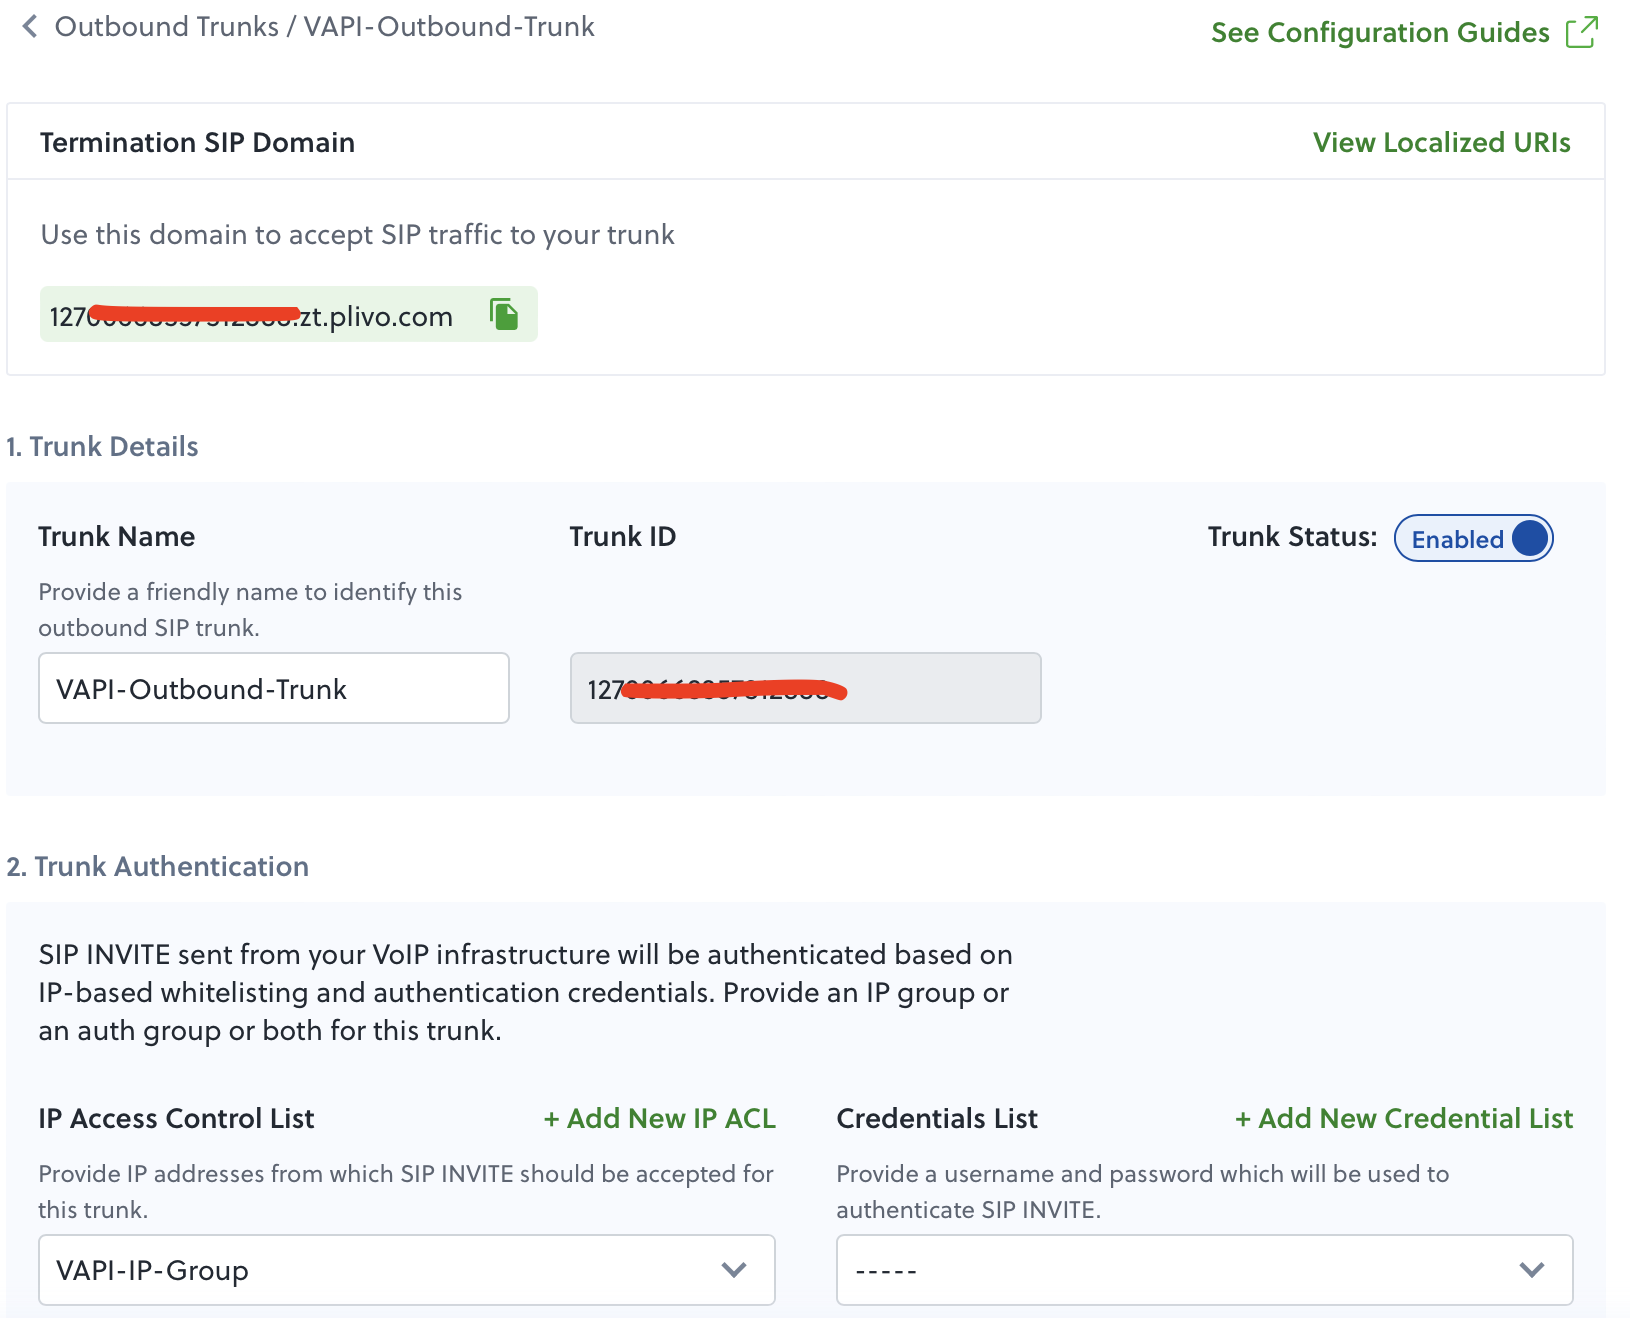
- After creating the trunk, copy the termination SIP domain (e.g.,
***********.zt.plivo.com).
- Follow the steps in this guide to purchase a number from Plivo.
Step 2: Configure Vapi with the outbound trunk
- Log in to the Vapi dashboard: Vapi Dashboard.
- Retrieve your Vapi API Key.
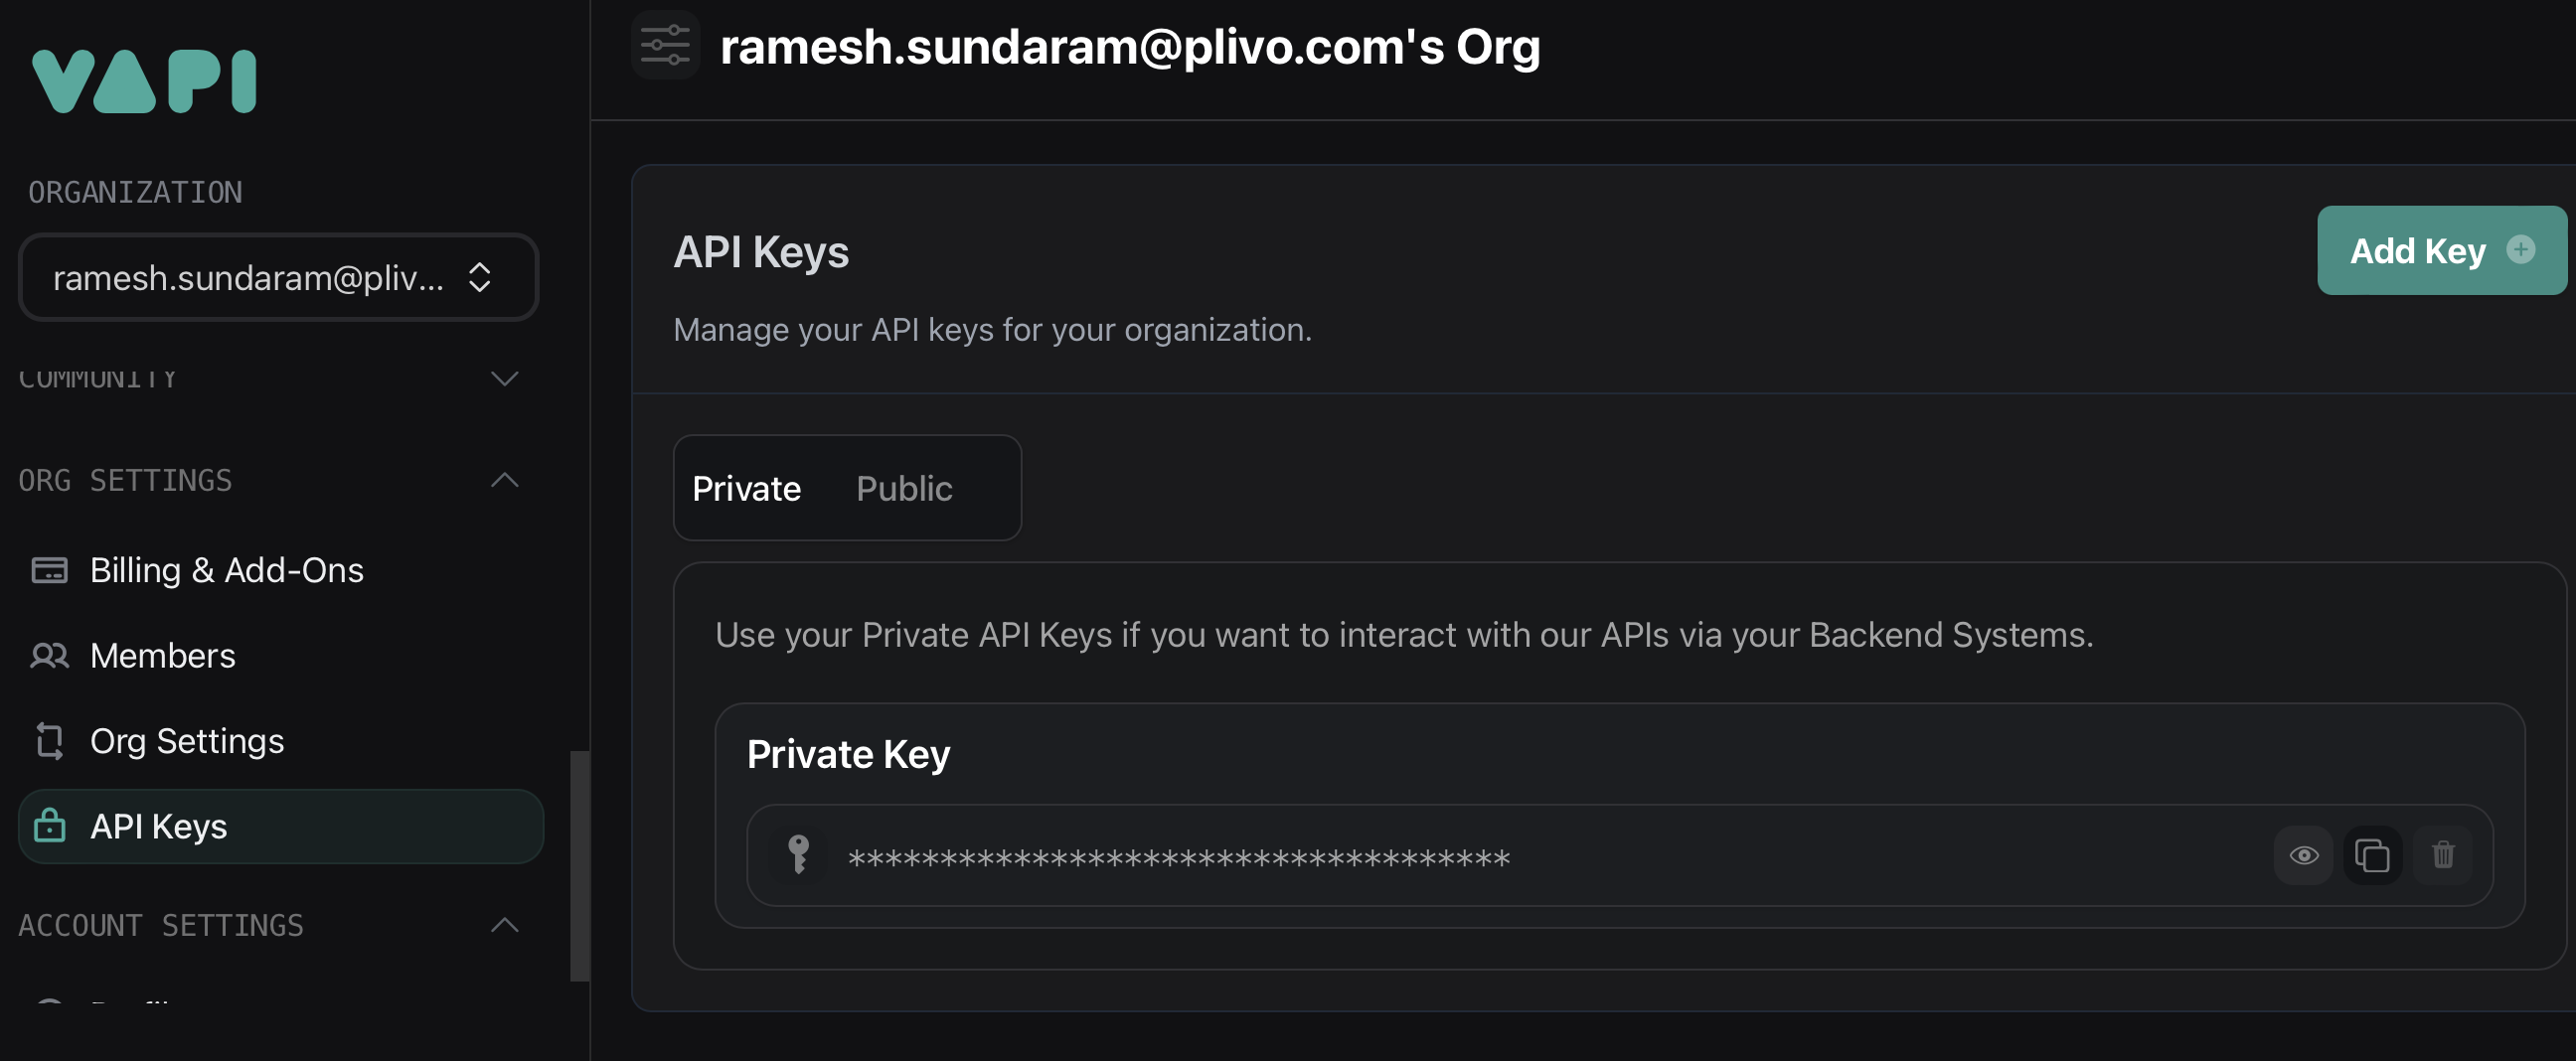
- Create a SIP trunk in Vapi using the Plivo termination SIP domain:

- Create a phone number and associate it with the newly created SIP trunk:

- Note the phone number ID from the response.
- Follow this guide to create an assistant in Vapi.
Step 3: Make outbound calls from Vapi
Use the phone number ID, assistant ID, and a destination number to place an outbound call via the Vapi API.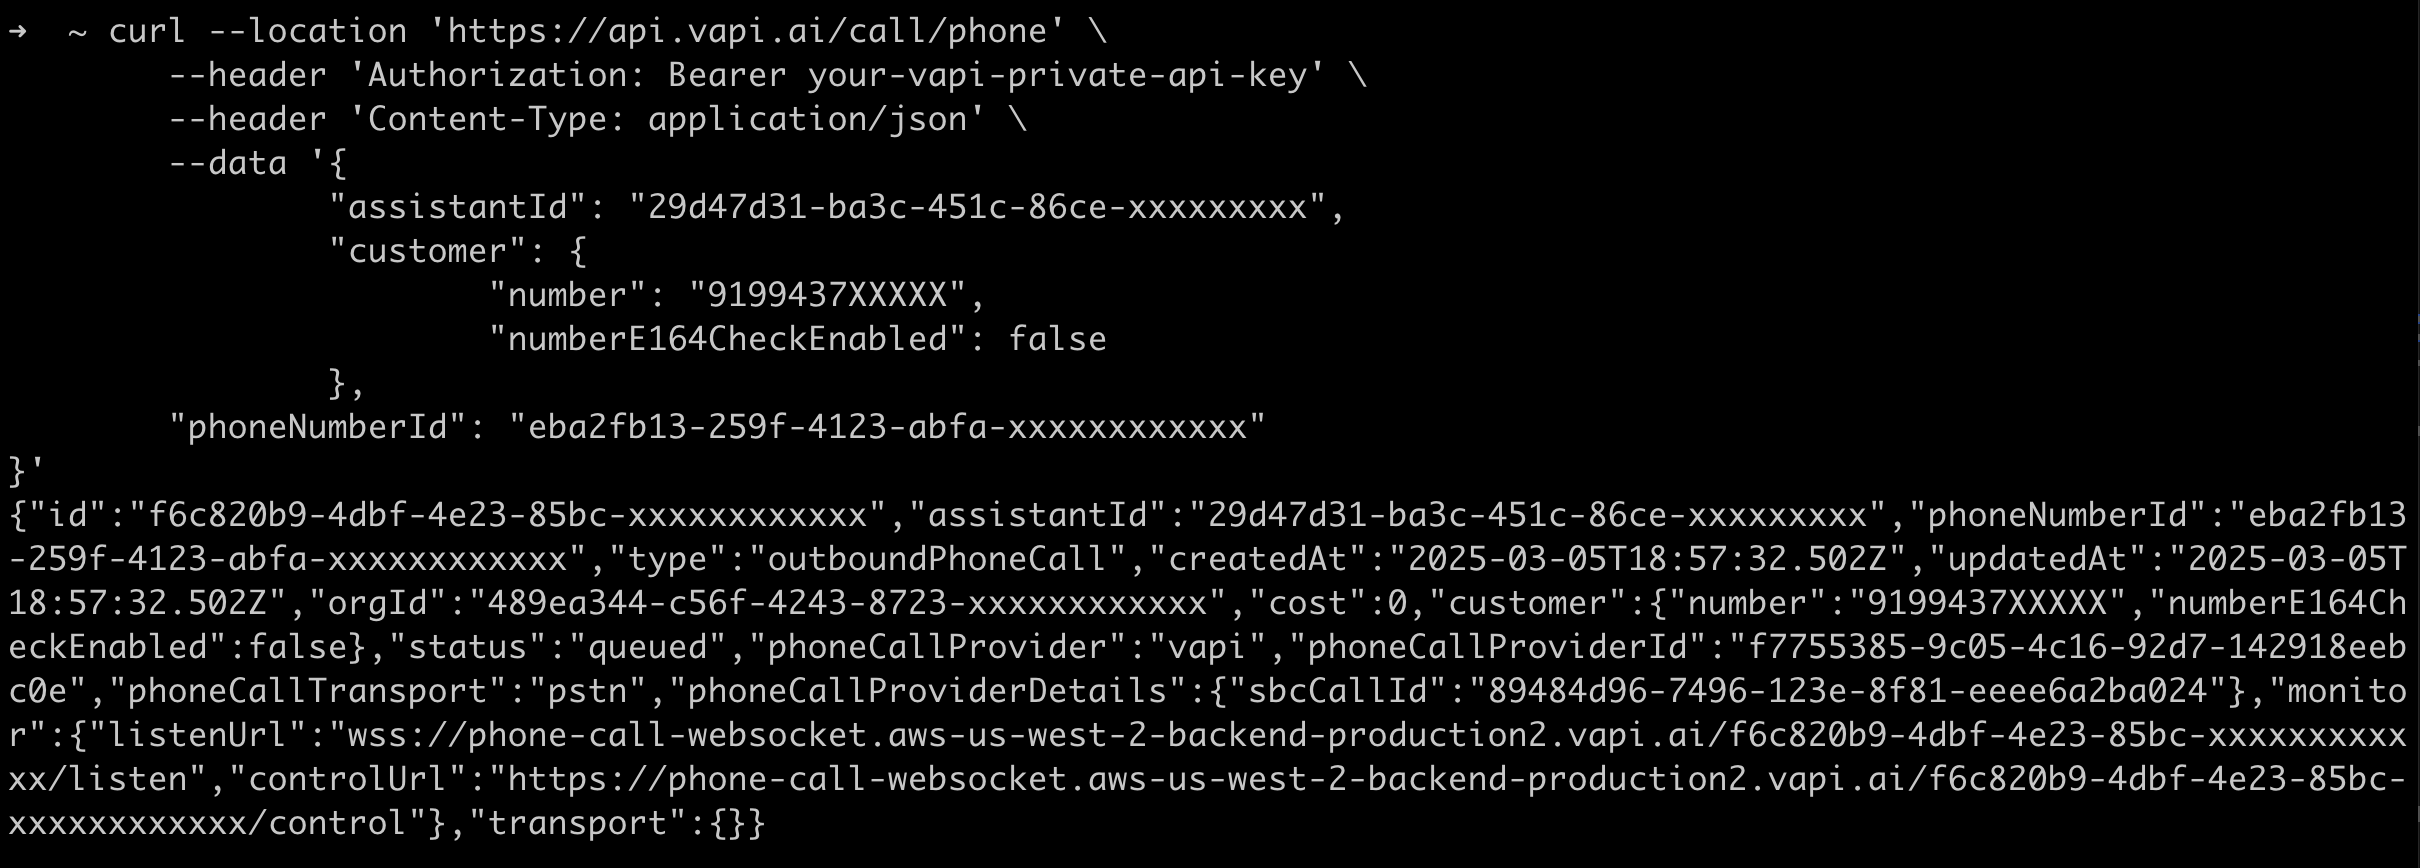
Configuring Inbound Calls
Follow these steps to route inbound calls from Plivo to Vapi.Step 1: Create an IP URI in Plivo
- Log in to the Plivo Console: Plivo Login.
- Navigate to Zentrunk (SIP) → Inbound Trunks → Origination URI.
- Create a new IP URI with the following details.
- Name: Choose a name.
- URI: Enter the Vapi SIP URI:
sip.vapi.ai;transport=udp.
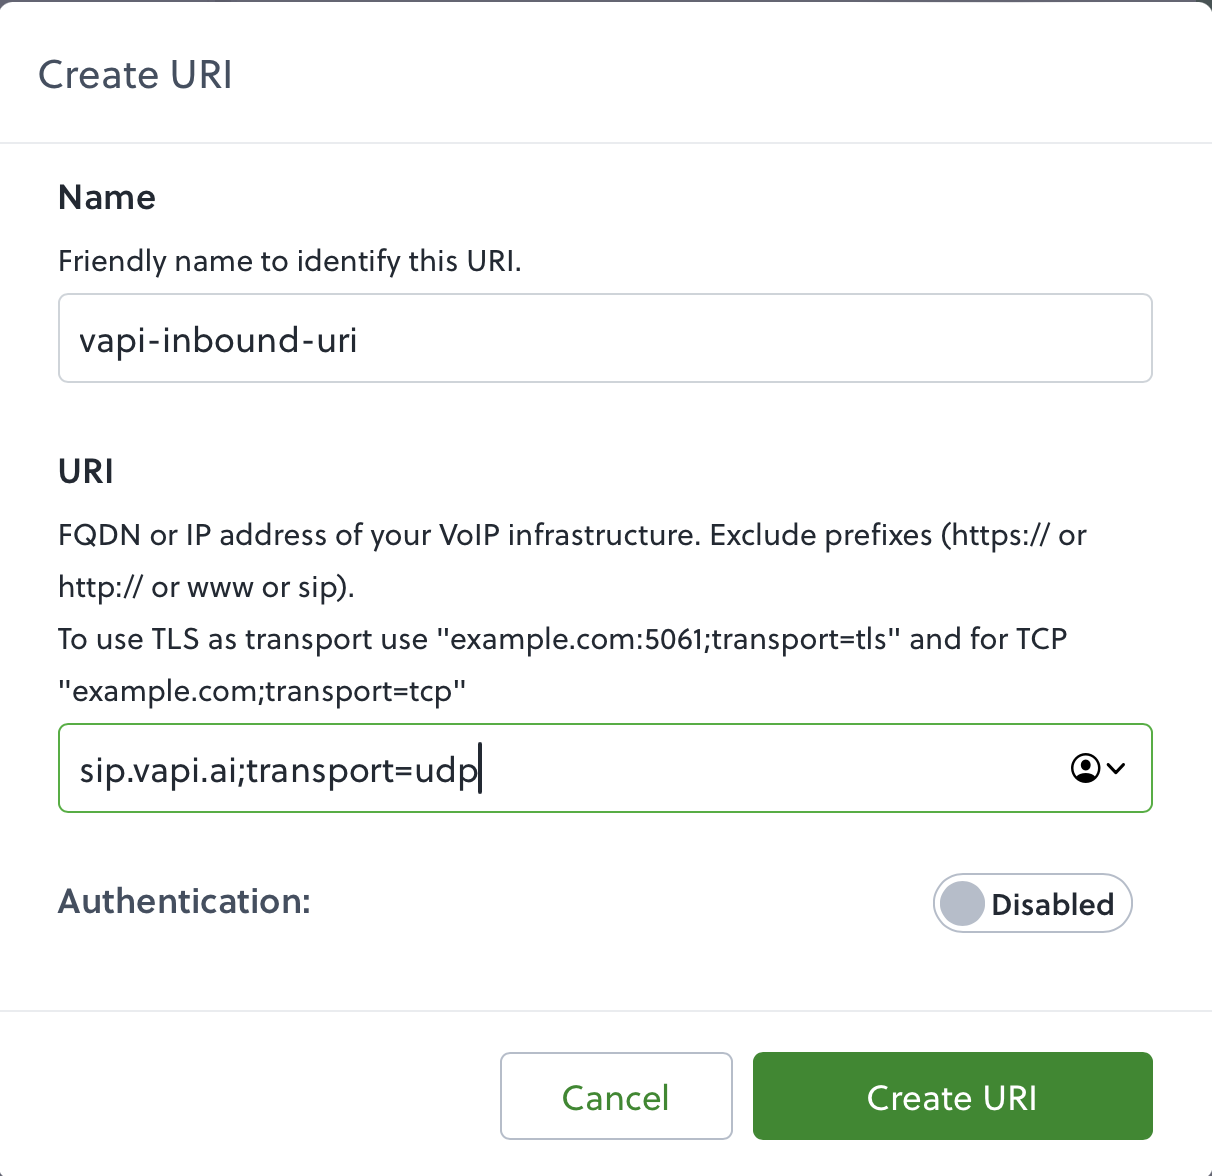
Step 2: Create an inbound trunk in Plivo
- Navigate to Zentrunk (SIP) → Inbound Trunks → Trunks → Create New Inbound Trunk.
- Provide a name for the trunk.
- Select the Primary URI created in the previous step.
- Create the trunk.
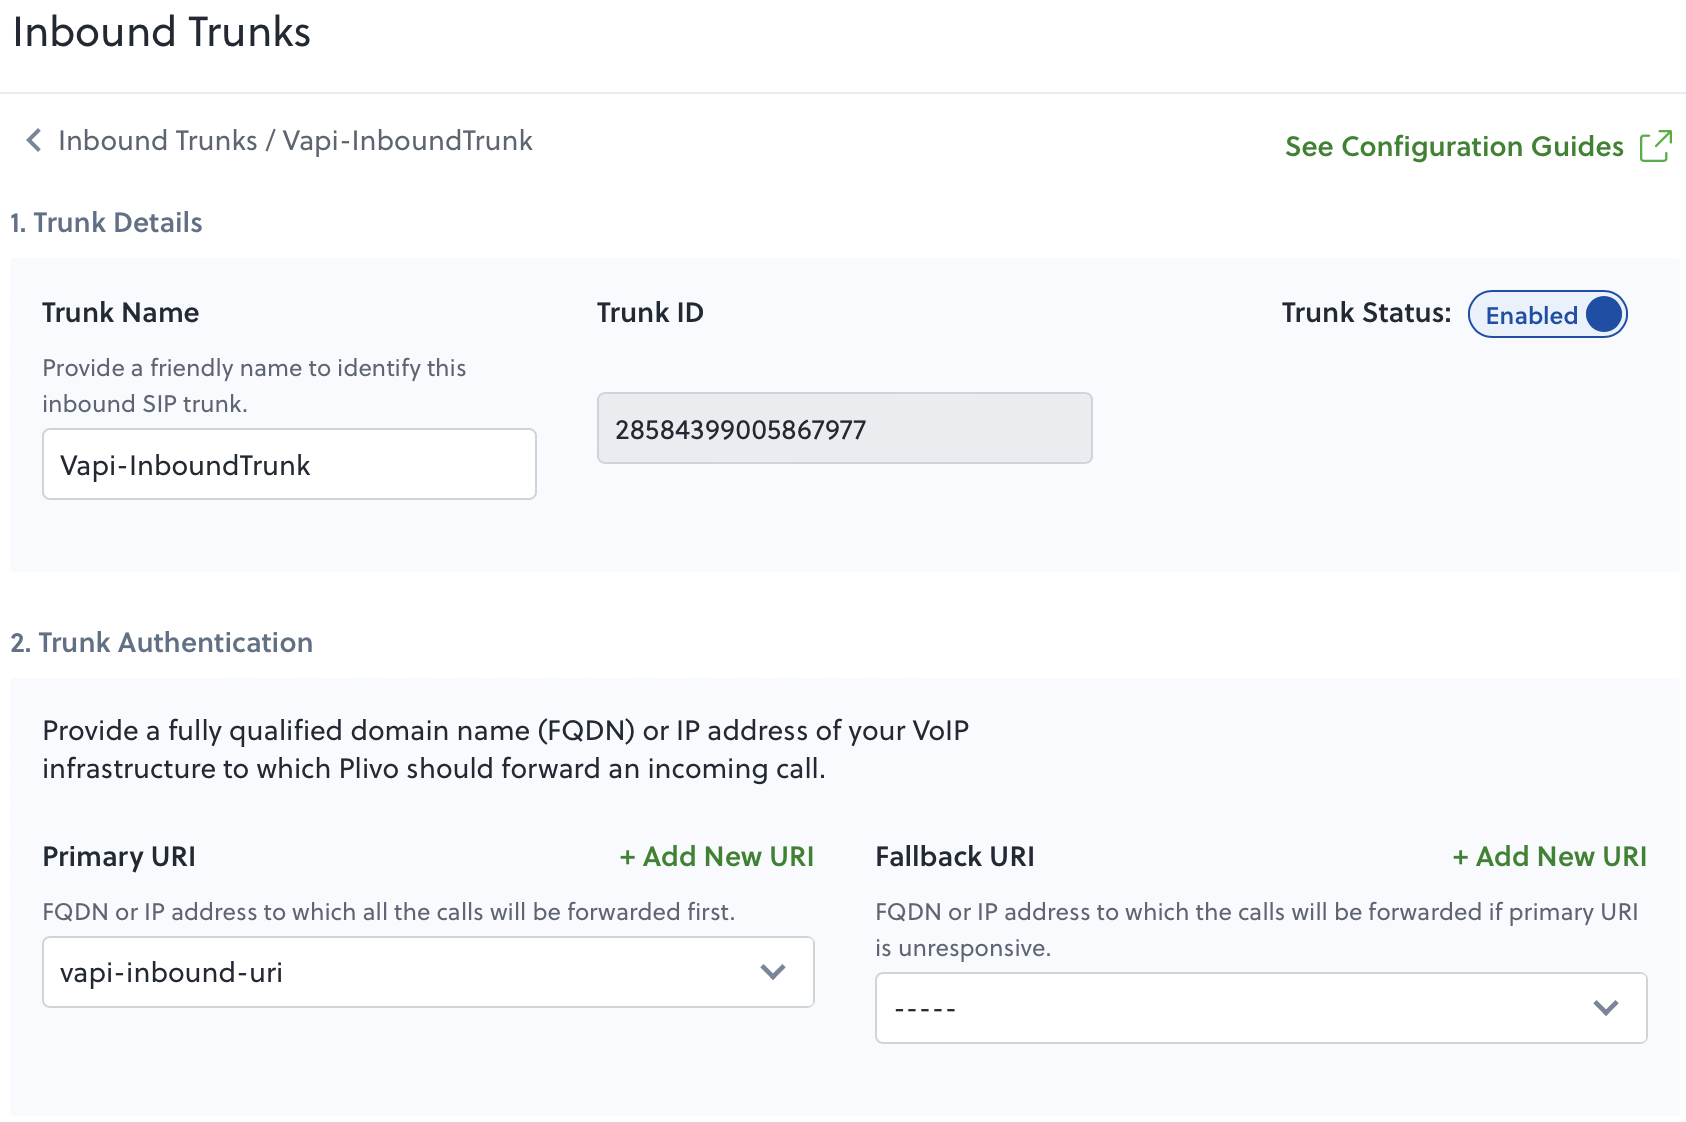
Step 3: Attach a Plivo phone number to the inbound trunk
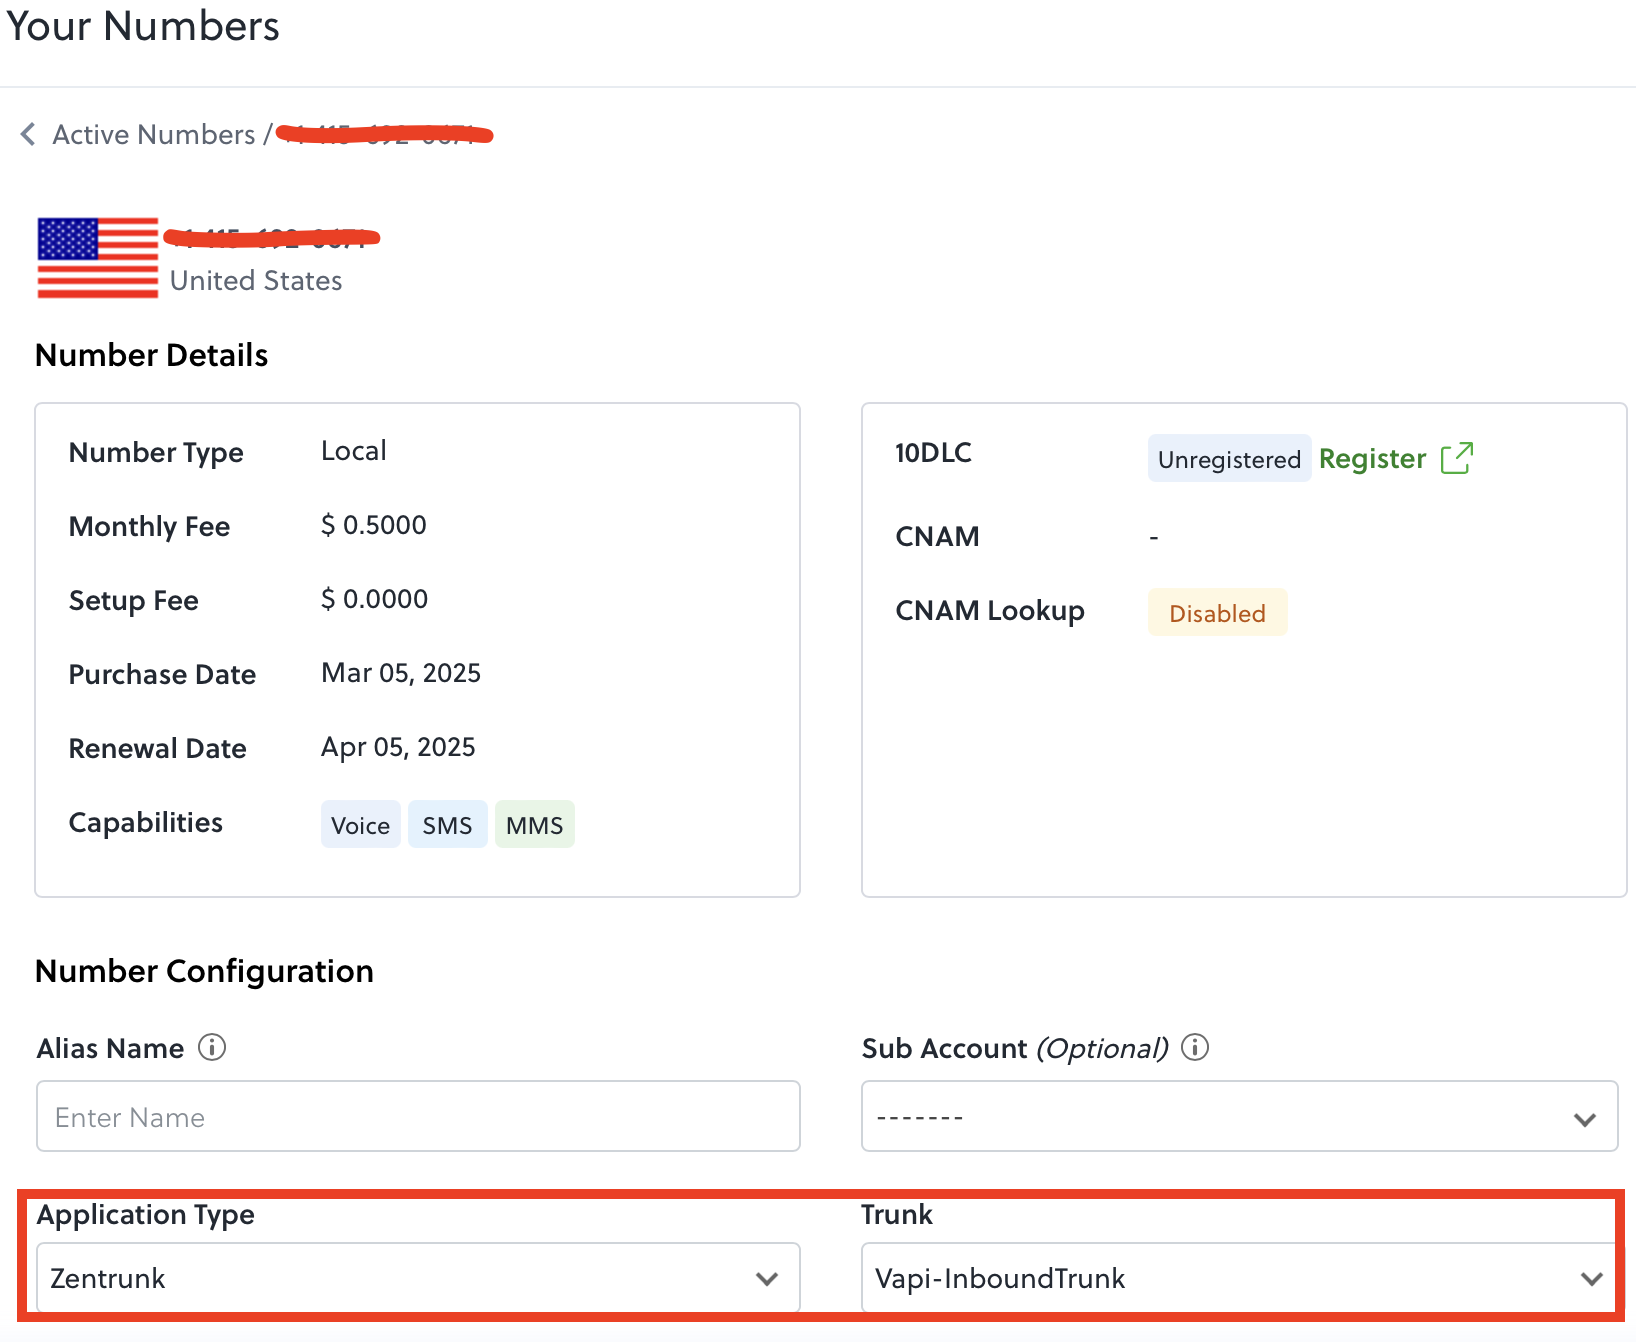
- Purchase or use an existing phone number from Plivo.
- Attach it to the newly created inbound trunk.
