- What: Transfer existing phone numbers to Plivo (port-in) or from Plivo (port-out) while keeping the same number
- Availability: US and Canada only. Port-in is free of charge
- How: Submit port-in request via Console with LOA (Letter of Authorization) + optional PIN/invoice. Select port-in date (min 2 business days out)
- Timeline: Up to 4 weeks (project porting of 100+ numbers may take longer)
- Critical: Do NOT close your old carrier account during porting. LOA name/address must match carrier records exactly or the request will be rejected
Number porting is available for US and Canada only. Port-in is free of charge.
Porting timeline
| Number Type | Timeline |
|---|---|
| Local numbers | Up to 4 weeks |
| Toll-free numbers | Similar timeline |
| Project porting (100+ numbers) | May take longer; requires numbers from same carrier account |
What numbers can be ported to Plivo?
- Local numbers (US and Canada)
- Toll-free numbers (US and Canada)
Required documents
You must have a Plivo Standard account to initiate a port-in request. See Account Management FAQ for account requirements. Before you send the porting request, make sure you have the following documents:| Document | Description | Required |
|---|---|---|
| Letter of Authorization (LOA) | Signed by the authorized user/owner of the number(s). Use our LOA template. | Mandatory for toll-free; optional for fixed numbers |
| PIN | Depending on coverage, may be required for US numbers. Include if you have one. | Optional |
| Recent Invoice | Copy of your most recent phone bill (within 30-60 days) showing account name, authorized username, and billing details. | Optional but recommended |
How to port your phone number to Plivo
Overview of the process
- Submit porting request documentation to Plivo
- Plivo submits the porting request to the gaining carrier
- The gaining carrier submits the porting request to the losing carrier
- The losing carrier approves or rejects the request
- If approved, Plivo notifies you of the Firm Order Commitment (FOC), or porting date
- On the FOC date, Plivo activates the number, tests all capabilities, and notifies you that the process is complete
Submit your port request
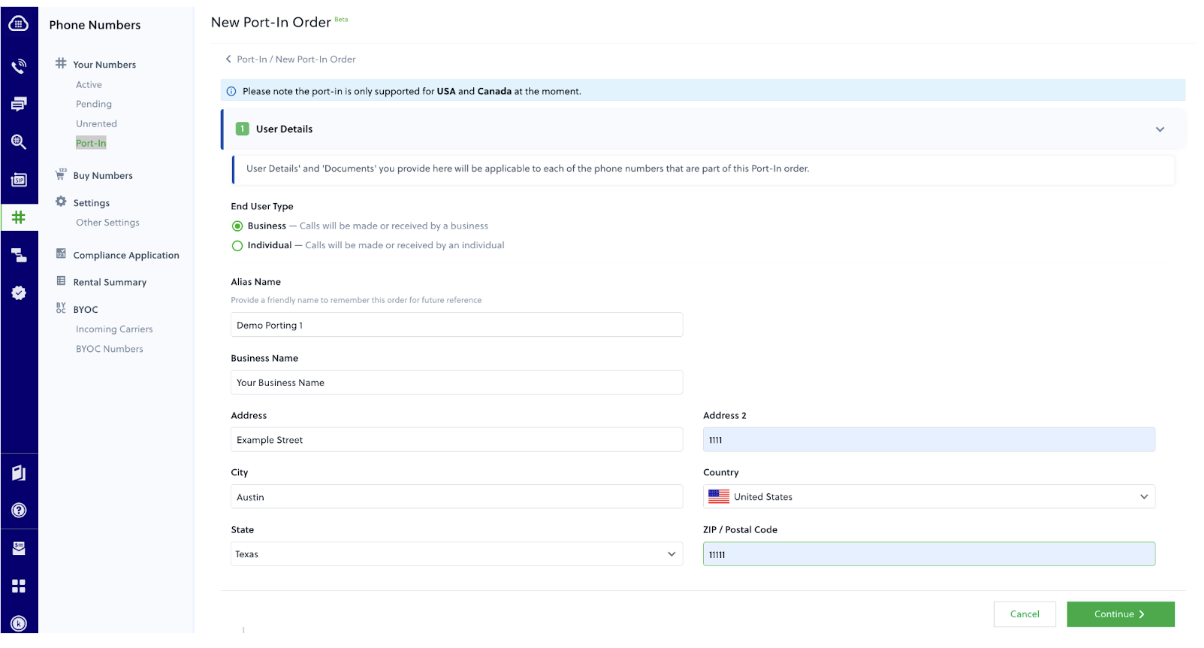
- Log in to the Plivo console and go to Phone Numbers > Port-In > New Port-In Order
- Fill in your business details on the User Details screen, then click Continue
- On the Port-In Details screen:
- Select the phone number type
- Select your preferred port-in date (at least 2 business days away)
- Add the numbers you want to port in
- Enter the current carrier’s account number and PIN (if applicable)
- Click Continue

- On the Numbers Configure screen:
- Select capabilities (Voice or Voice + SMS)
- Enter an alias for identification
- Select a subaccount (optional)
- Enter a CNAM for caller ID branding (optional)
- Select the XML, , or Zentrunk application to associate with the numbers
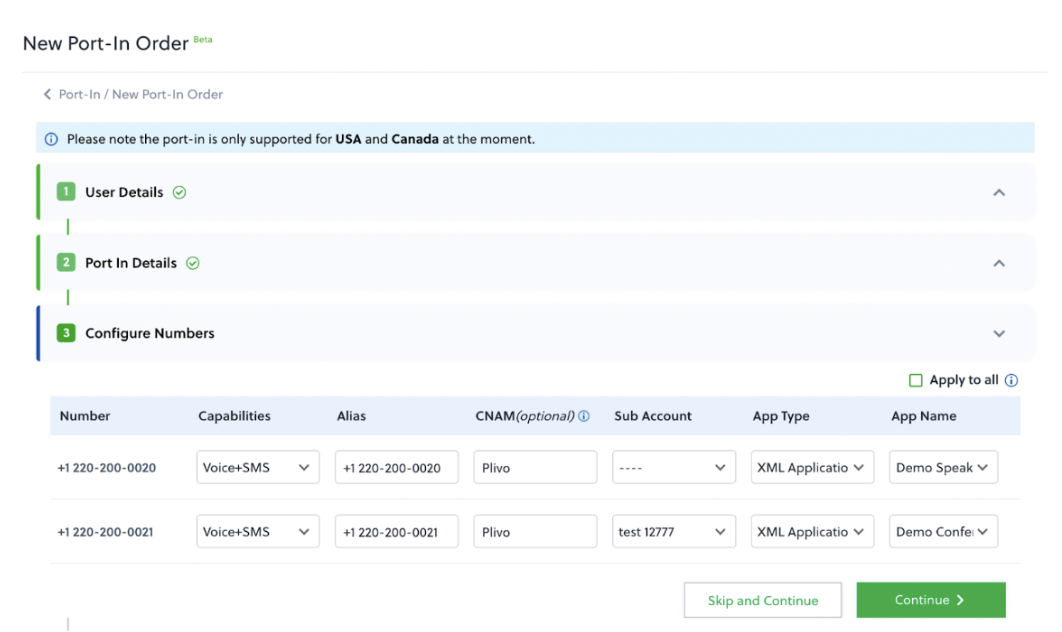
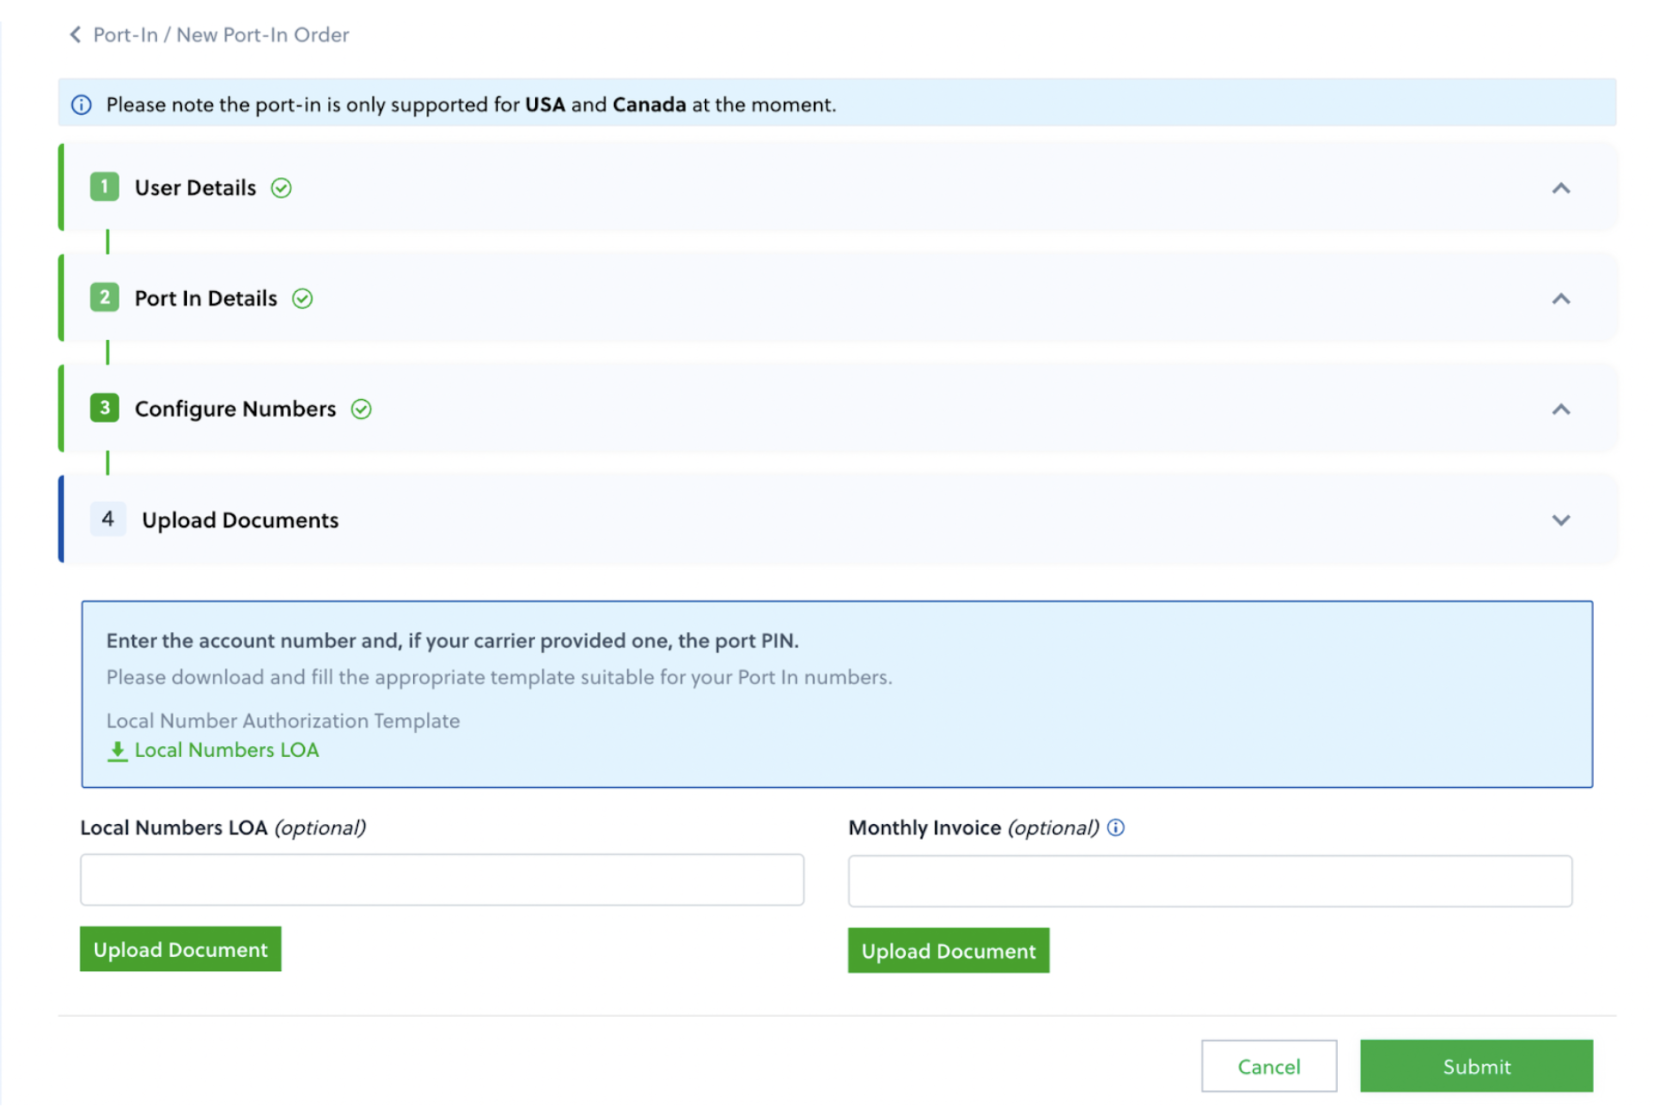
- Upload supporting documents (LOA, invoice) and click Submit
Don’t close your account with your old carrier until the porting process is complete. Keep your numbers active to avoid downtime.
Port request statuses
| Status | Description | Action |
|---|---|---|
| Submitted | Request received | Wait for carrier processing |
| Approved | Carrier accepted | Wait for FOC date |
| Completed | Successfully ported | Number is active on Plivo |
| Rejected | Request denied | Review rejection reason, resubmit |
| Update Required | Information needs correction | Plivo will contact you |
What happens after submission
If all details and documents are acceptable, Plivo submits the porting request to the gaining carrier. This takes about a day. The gaining carrier verifies the request and forwards it to the losing carrier. The request shows as pending while the losing carrier processes it (5-20 business days). Once processed, you’ll receive a status update:- Approved: Plivo receives a Firm Order Commitment (FOC) with the porting date
- Update Required: Plivo contacts you to re-submit corrected information
- Rejected: Plivo explains the rejection so you can resubmit with correct details
FOC/porting date
Plivo sends you an email with your porting date and adds the numbers to your account two days before the FOC. Have your application set up and ready before the FOC date to avoid service interruption. You can configure numbers at Phone Numbers > Port-In > Configure Number.Handling rejected requests
Common rejection reasons
| Reason | Solution |
|---|---|
| Data mismatch | Update LOA to match carrier records exactly |
| Name mismatch | Verify name with current carrier |
| Address mismatch | Use address from carrier’s CSR |
| Unsatisfactory business relationship | Pay outstanding balance to current carrier |
| Number not portable | Contact Plivo support |
How to fix and resubmit
- Review the rejection reason in the console or email
- Correct the issue (usually LOA information mismatch)
- Submit a new port request with corrected information
Escalating port-in issues
If your port request is stuck or you’re experiencing issues that require carrier intervention:-
Contact Plivo Support at support.plivo.com with:
- Your port request ID
- Phone number(s) affected
- Description of the issue
- Any error messages received
-
Plivo’s porting team will:
- Review your request status with the carrier
- Escalate to the carrier’s porting department if needed
- Provide updates on resolution timeline
Plivo cannot directly contact carriers on your behalf for account-specific issues (like outstanding balances). You may need to resolve these with your current carrier before resubmitting.
Cancel a port request
Before carrier acceptance:- Navigate to Port-In orders in console
- Select the order
- Click Cancel
Plivo cannot expedite the porting process as it involves multiple carriers. You can request your current carrier to release the number, which may help speed things up.
Porting numbers out of Plivo
To transfer numbers from Plivo to another carrier:- Contact your new carrier and submit a port-in request with your Plivo number(s)
- New carrier validates and submits port-out request to Plivo’s carriers
- Plivo emails you to confirm the request
- You authorize or stop the transfer
- Number transfers on the FOC date
How to stop or delay a port-out
If you receive a port-out notification and want to stop or delay it: To stop a port-out:- Reply to the port-out confirmation email from Plivo
- Clearly state you want to reject the port-out request
- Include the phone number(s) and reason for rejection
- Contact Plivo Support immediately
- Provide:
- Phone number(s) involved
- Current FOC (porting) date
- Requested new completion date
- Reason for delay
- Plivo will work with the gaining carrier to reschedule
After port-out
- Number loses service with Plivo on FOC date
- Number is removed from your Plivo account
- If you don’t respond to the confirmation email, Plivo automatically processes the port-out
Unauthorized port-out disputes
If a number was ported away without your authorization, contact Plivo Support immediately with:- Affected phone number(s)
- Reason for dispute
- Signed and dated LOA from the end user confirming intent to retain service
Dispute timeline
- Disputes must be filed within 30 days
- Plivo works with carriers to retrieve the number
- Resolution time varies by carrier