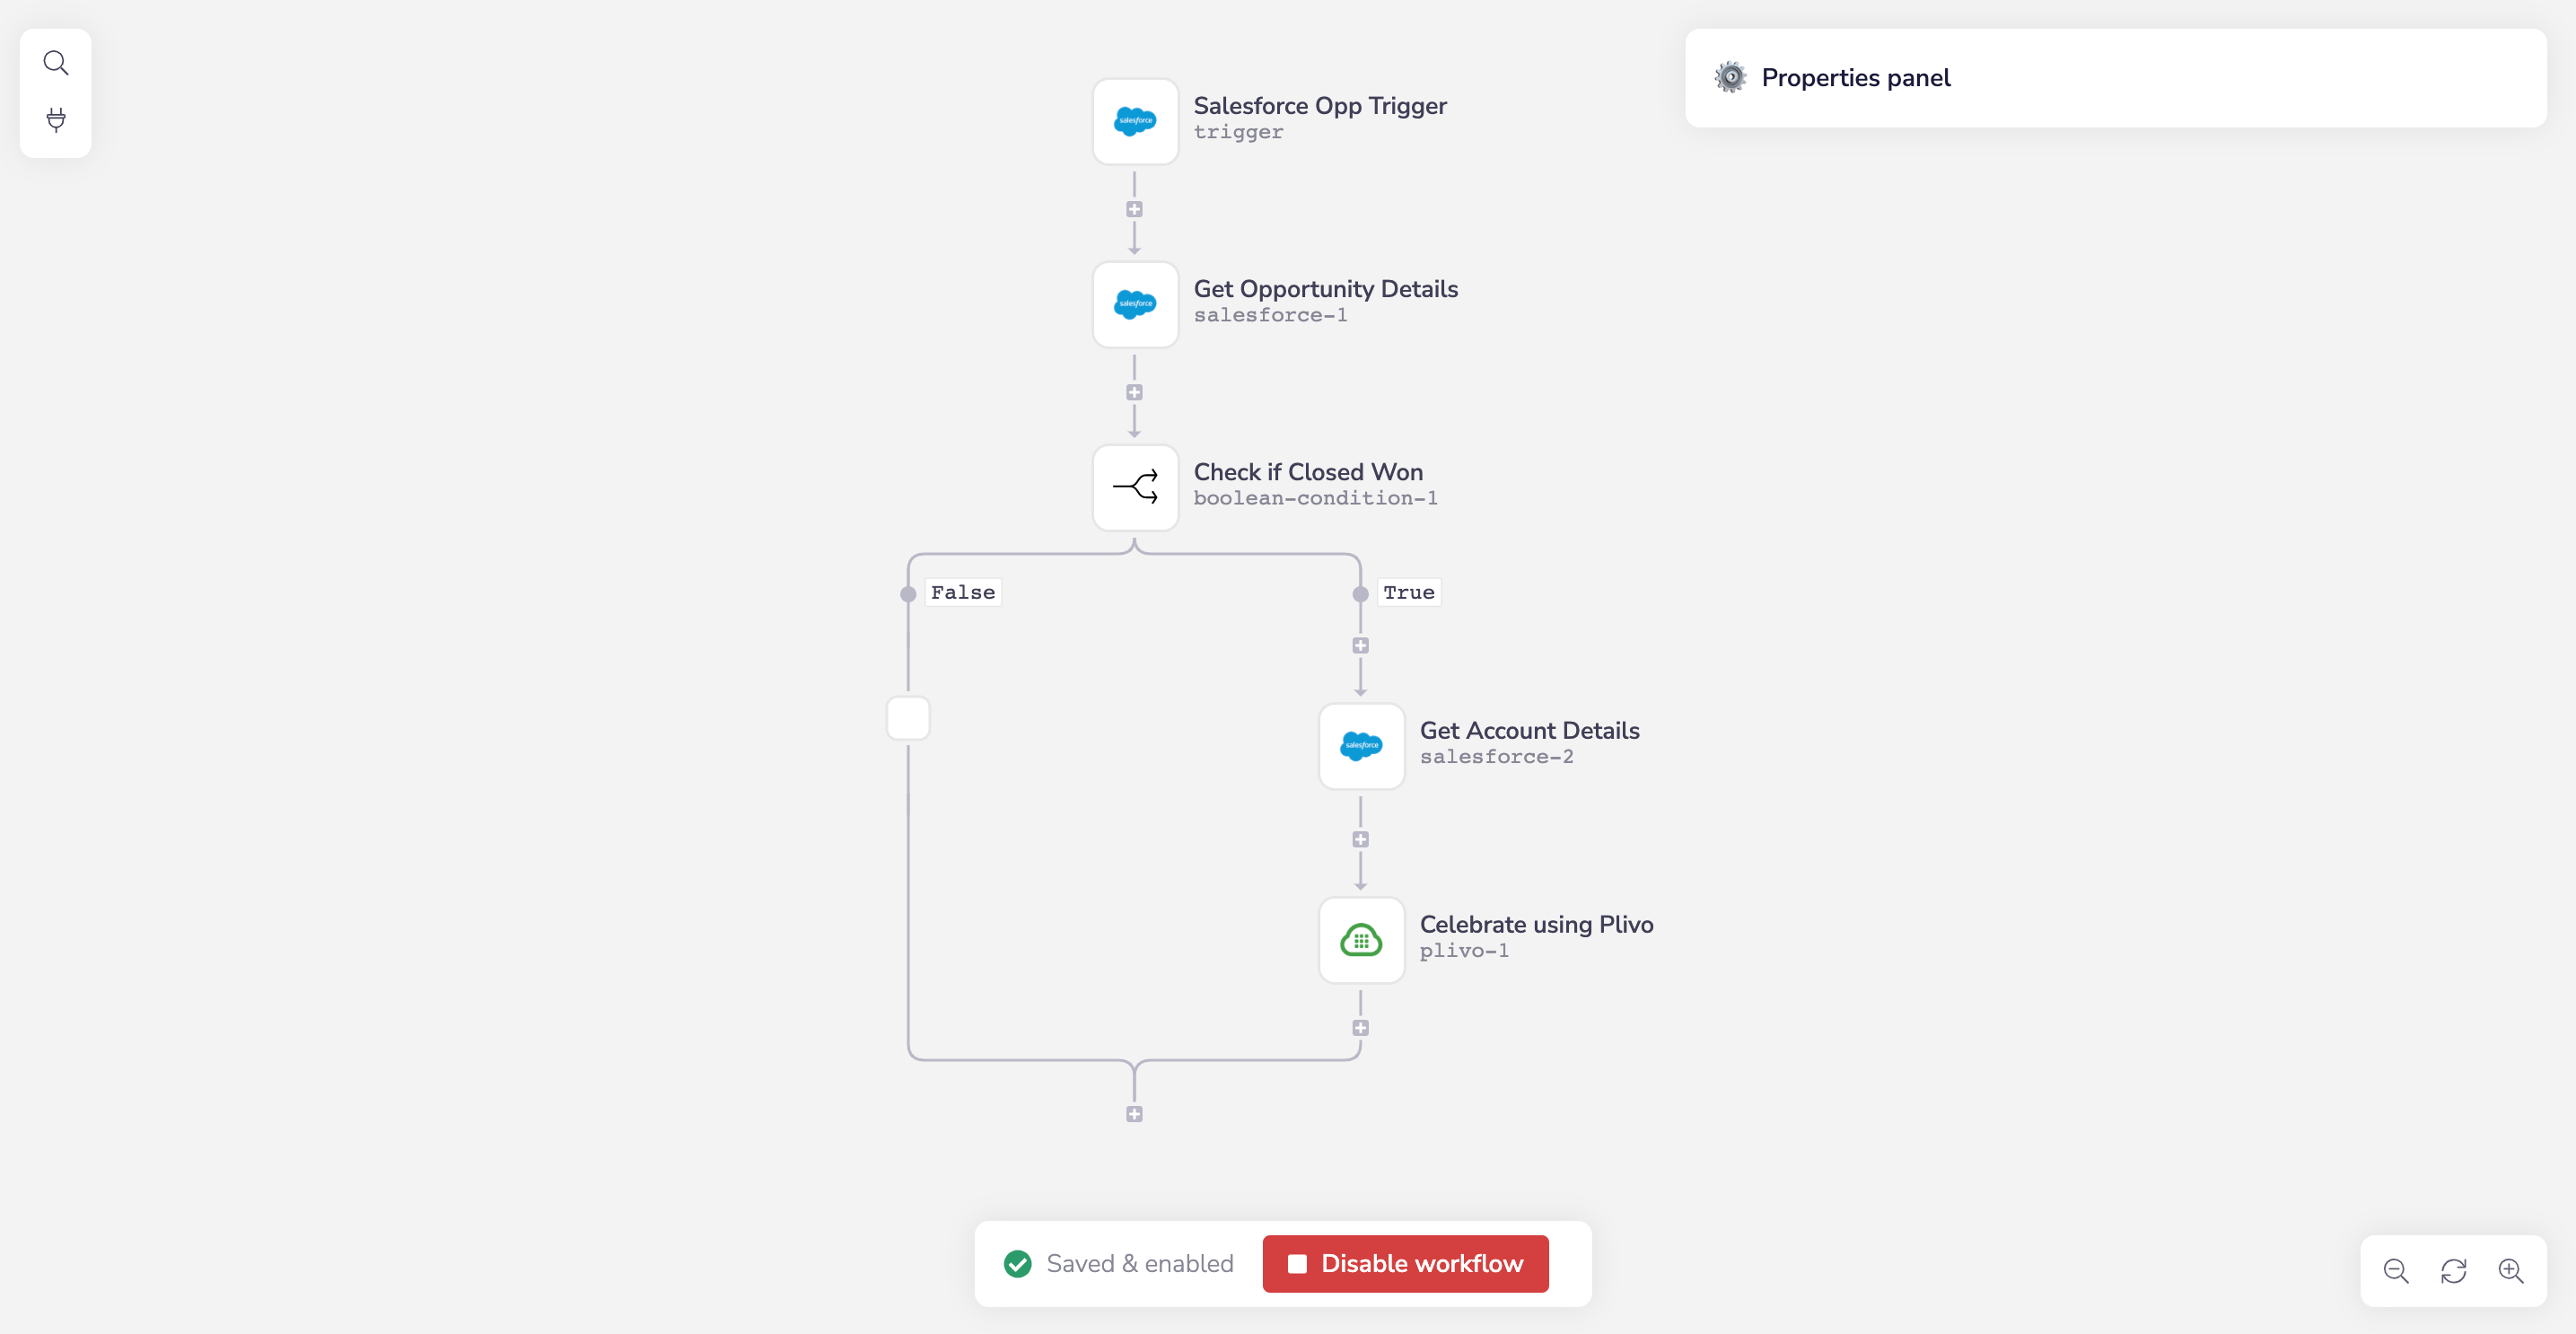
Complete Flow
- Click on the Salesforce trigger to configure it. At the top of the properties panel at the right of the screen select “On Record Update” as the action.
- Click Describe and rename the tool Salesforce Opp Trigger.
- Click Authenticate and enter your Salesforce credentials.
- Click Input data, and from the Record type drop-down, select “Opportunity.”
Salesforce Opp Trigger
- In the properties panel, click Describe and rename the tool Get Opportunity Details.
- Click Authenticate and enter your Salesforce credentials.
- Click Input Data, and from the Record type drop-down, select “Opportunity.”
- Under Fields, click Add to Fields and add the Name, Account ID, Stage, Amount, and Close Date fields. We’re retrieving more than just the Stage field because we plan to use the values of the other fields in our future text message.
- Now we specify that we want these field values only from the record with the Opportunity ID that triggered the workflow. Under Conditions, click Add to Conditions. A new condition will appear. Set Field to Opportunity ID and Operator to Equal to. For Value, click on the datatype dropdown and choose jsonpath. Then click in the field to pick the ID, which then shows up in the box as $.steps.trigger.events[0].Id. Alternatively, you can drag the mouse from the Value setting to the Salesforce Opp Trigger icon and select the ID field there.
- In the properties panel, click Describe and rename the tool Check If Closed Won.
- Click Input data and fill in some required values.
- For 1st Value field, click the datatype drop-down and choose jsonpath. Then click in the field and choose Stage, which will show up as $.steps.salesforce-1.records[0].StageName. Alternatively, you can drag the mouse from the 1st Value setting to the previous step in the workflow and select the stage name field there.
- For Comparison type, use Contains.
- For 2nd Value, enter “Closed Won” (without the quotation marks).
- In the properties panel, click Describe and rename the tool Get Account Details.
- Set the action at the top of the configuration pane to “Find records.”
- Set Record type to “Account.”
- Under Fields, click Add to Fields and add the Account Name field.
- Under Conditions, click Add to Conditions. A new condition will appear. Set Field to Account ID, Operator to Equal to, and Value to $.steps.salesforce-1.records[0].AccountId. Alternatively, you can drag the mouse from the Value setting to the previous step in the workflow and select the stage name field there. This gives us access to the Account Name of the Account record whose ID matches the Account ID we retrieved earlier, which we’ll use in the text message we plan to send.
- In the properties panel, click Describe and rename the tool Celebrate Using Plivo.
- Set the action at the top of the properties panel to “Send an MMS.”
- Click Authenticate, then enter your Plivo authentication information. You can find your Plivo Auth ID and Auth Token on the overview page of the Plivo console.
- Click Input data. For Source, enter the number you want to be the caller ID for the text message. Set Destination to be the phone number you want to receive the text message. Set Text to: New opportunity closed won, let’s celebrate! Account Name:
{$.steps.salesforce-2.records[0].Name} Owner Name: {$.steps.salesforce-1.records[0].Opportunity_Owner_Name__c} Closed Date: {$.steps.salesforce-1.records[0].CloseDate}To enter the variable names, begin typing{$and you’ll see a list of values from which to select. Click Add to Media URLs. Set Media URL to “” which is the address of a happy GIF file. If you left this off, you could send an SMS message instead of MMS; the process is otherwise the same.
If you’re using a Plivo Trial account, you can make calls only to phone numbers that have been verified with Plivo. You can verify (sandbox) a number by going to the console’s Phone Numbers Sandbox Numbers page.