Install .NET Framework and the Plivo NuGet package
To get started, install and set up .NET Framework 4.6 or higher and Plivo’s .NET SDK.Install .NET Framework
| Operating System | Instructions |
|---|---|
| macOS and Linux | To see if you already have .NET Framework installed, run the command dotnet —version in a terminal window. If you don’t have it, download and install it. |
| Windows | To install .NET Framework on Windows, follow these instructions. |
Install the Plivo .NET SDK using Visual Studio
To install the Plivo .NET SDK:- Create a new project in Visual Studio.

- Choose a template for the new project.

- Install the Plivo NuGet package.


Trigger the PHLO
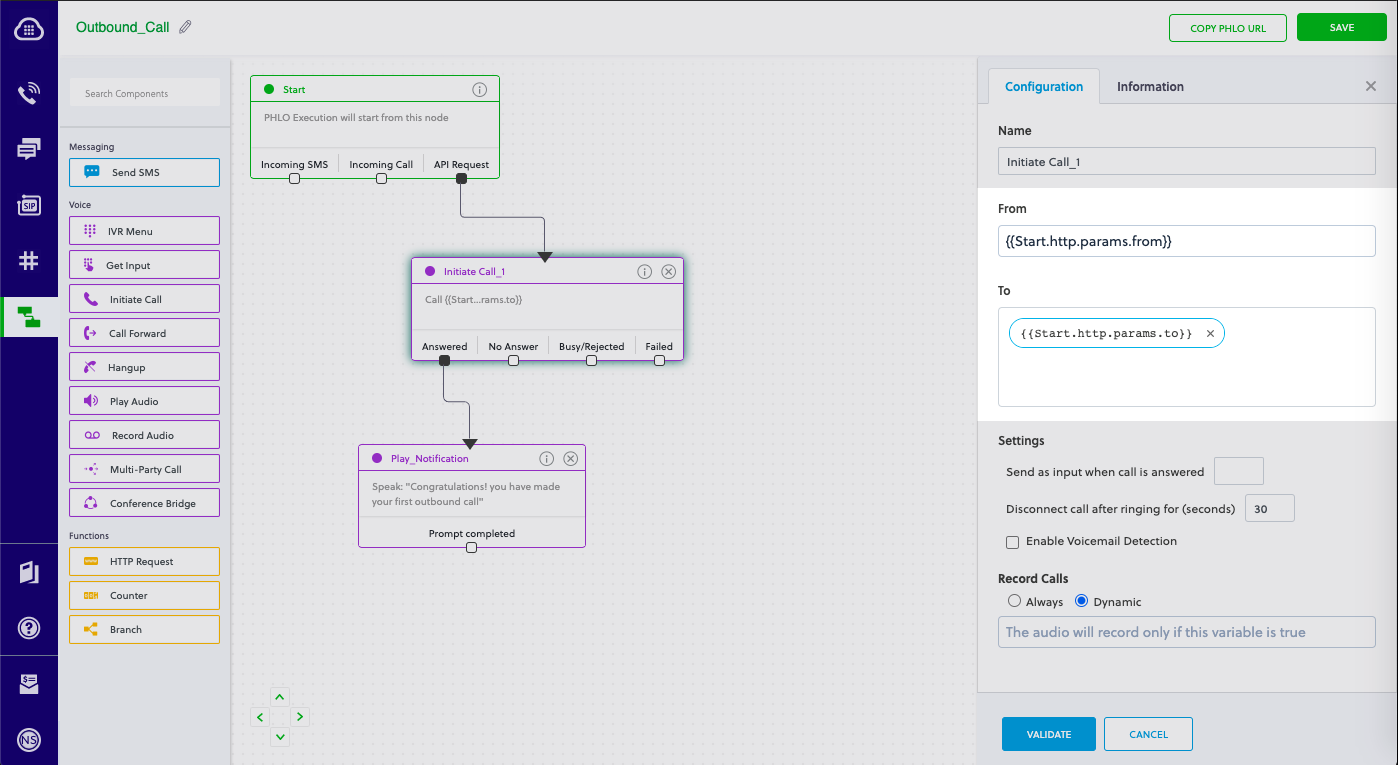
Create and configure a PHLO, then integrate the PHLO into your application workflow by making an API request to trigger the PHLO with the required payload. You can run a PHLO with static payload values by entering specific values in fields likefrom and to on the PHLO console.
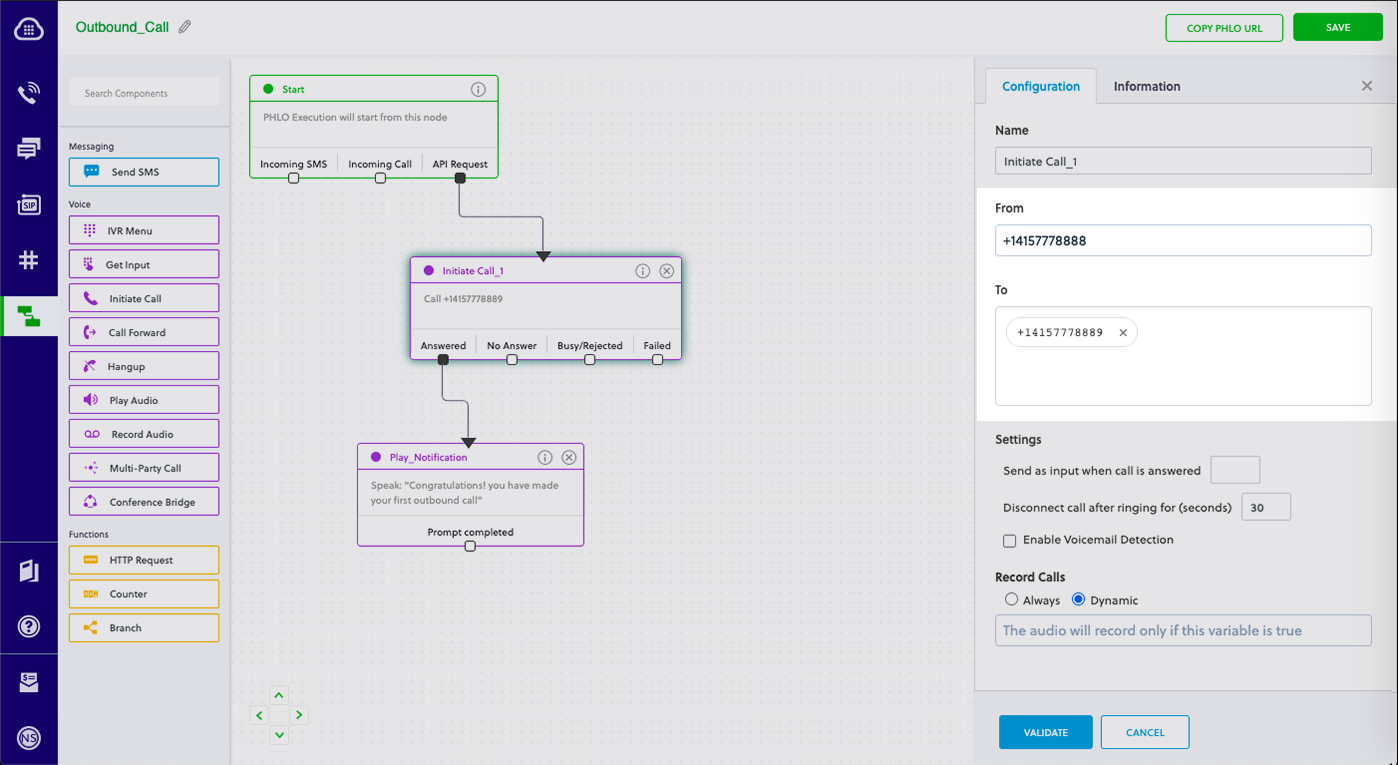
Static payload
Dynamic payload
- Replace the placeholders
<auth_id>and<auth_token>with your authentication credentials, which you can find on the overview page of the Plivo console. - We recommend that you store your credentials in the
auth_idandauth_tokenenvironment variables to avoid the possibility of accidentally committing them to source control. If you do this, you can initialize the client with no arguments and it will automatically fetch the values from the environment variables. - You can use the Environment.SetEnvironmentVariable method to store environment variables, and fetch them using the Environment.GetEnvironmentVariable method while initializing the client.
- Replace the placeholder
<phlo_id>with the PHLO_ID from the PHLO list screen of the Plivo console. - Replace the placeholder
<Caller_ID>with a phone number you’ve purchased, and<Destination_Number>with the phone number you’ll be calling. Both phone numbers should be in E.164 format.
Note: If you’re using a free trial account you must verify (sandbox) your destination number, unless you use the phone number you used for signup verification as your destination number. We require this as a security measure to avoid abuse. To sandbox a number in a Plivo trial account, visit Phone Numbers > Sandbox Numbers and click on Add Sandbox Number.